
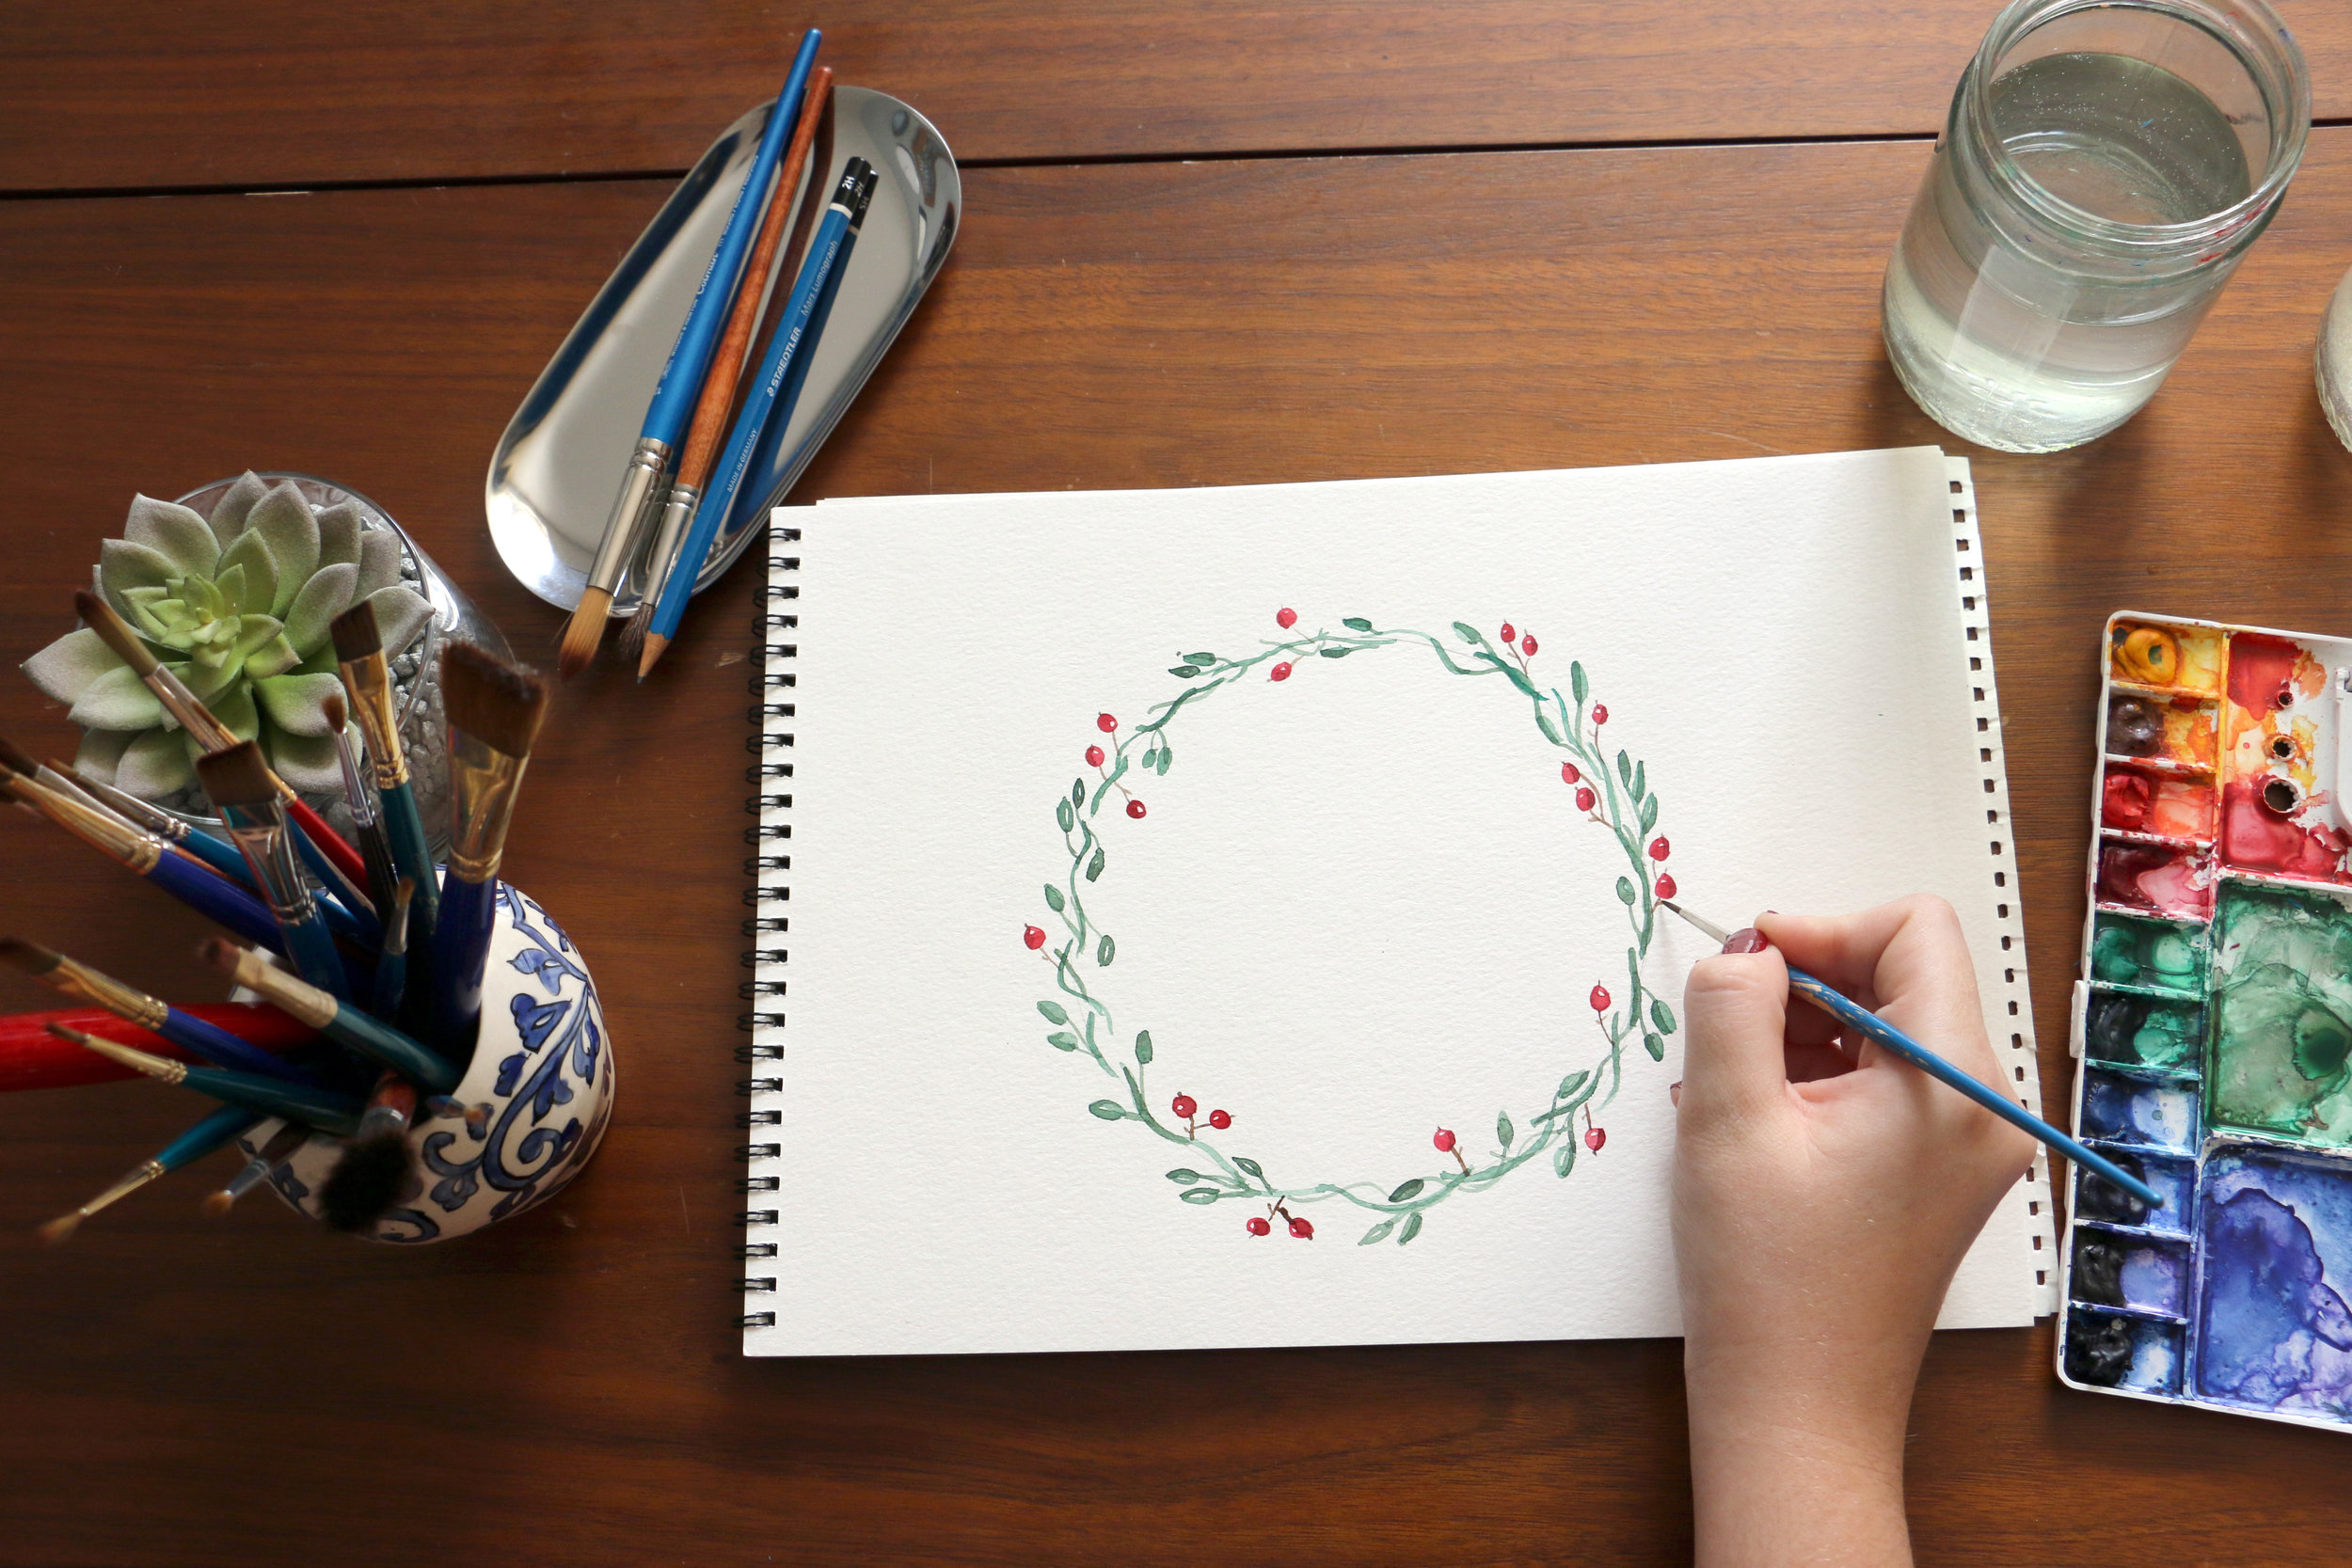
I'm in a festive spirit right now (hellooo December!) so today we're going to paint a holiday wreath! This can be a great piece to use as you decorate your home for the holidays, or as a Christmas card to send to family and friends. Before we start, if you haven't read it yet, take a look at this post to learn more about the supplies I typically use. Today, you'll need some red and green watercolor paints, a size 1 Cotman round paint brush, and watercolor paper. In this post I have a step-by-step guide to painting the wreath as well as a time-lapse video showing the whole process (scroll to the bottom for the video or click here!).
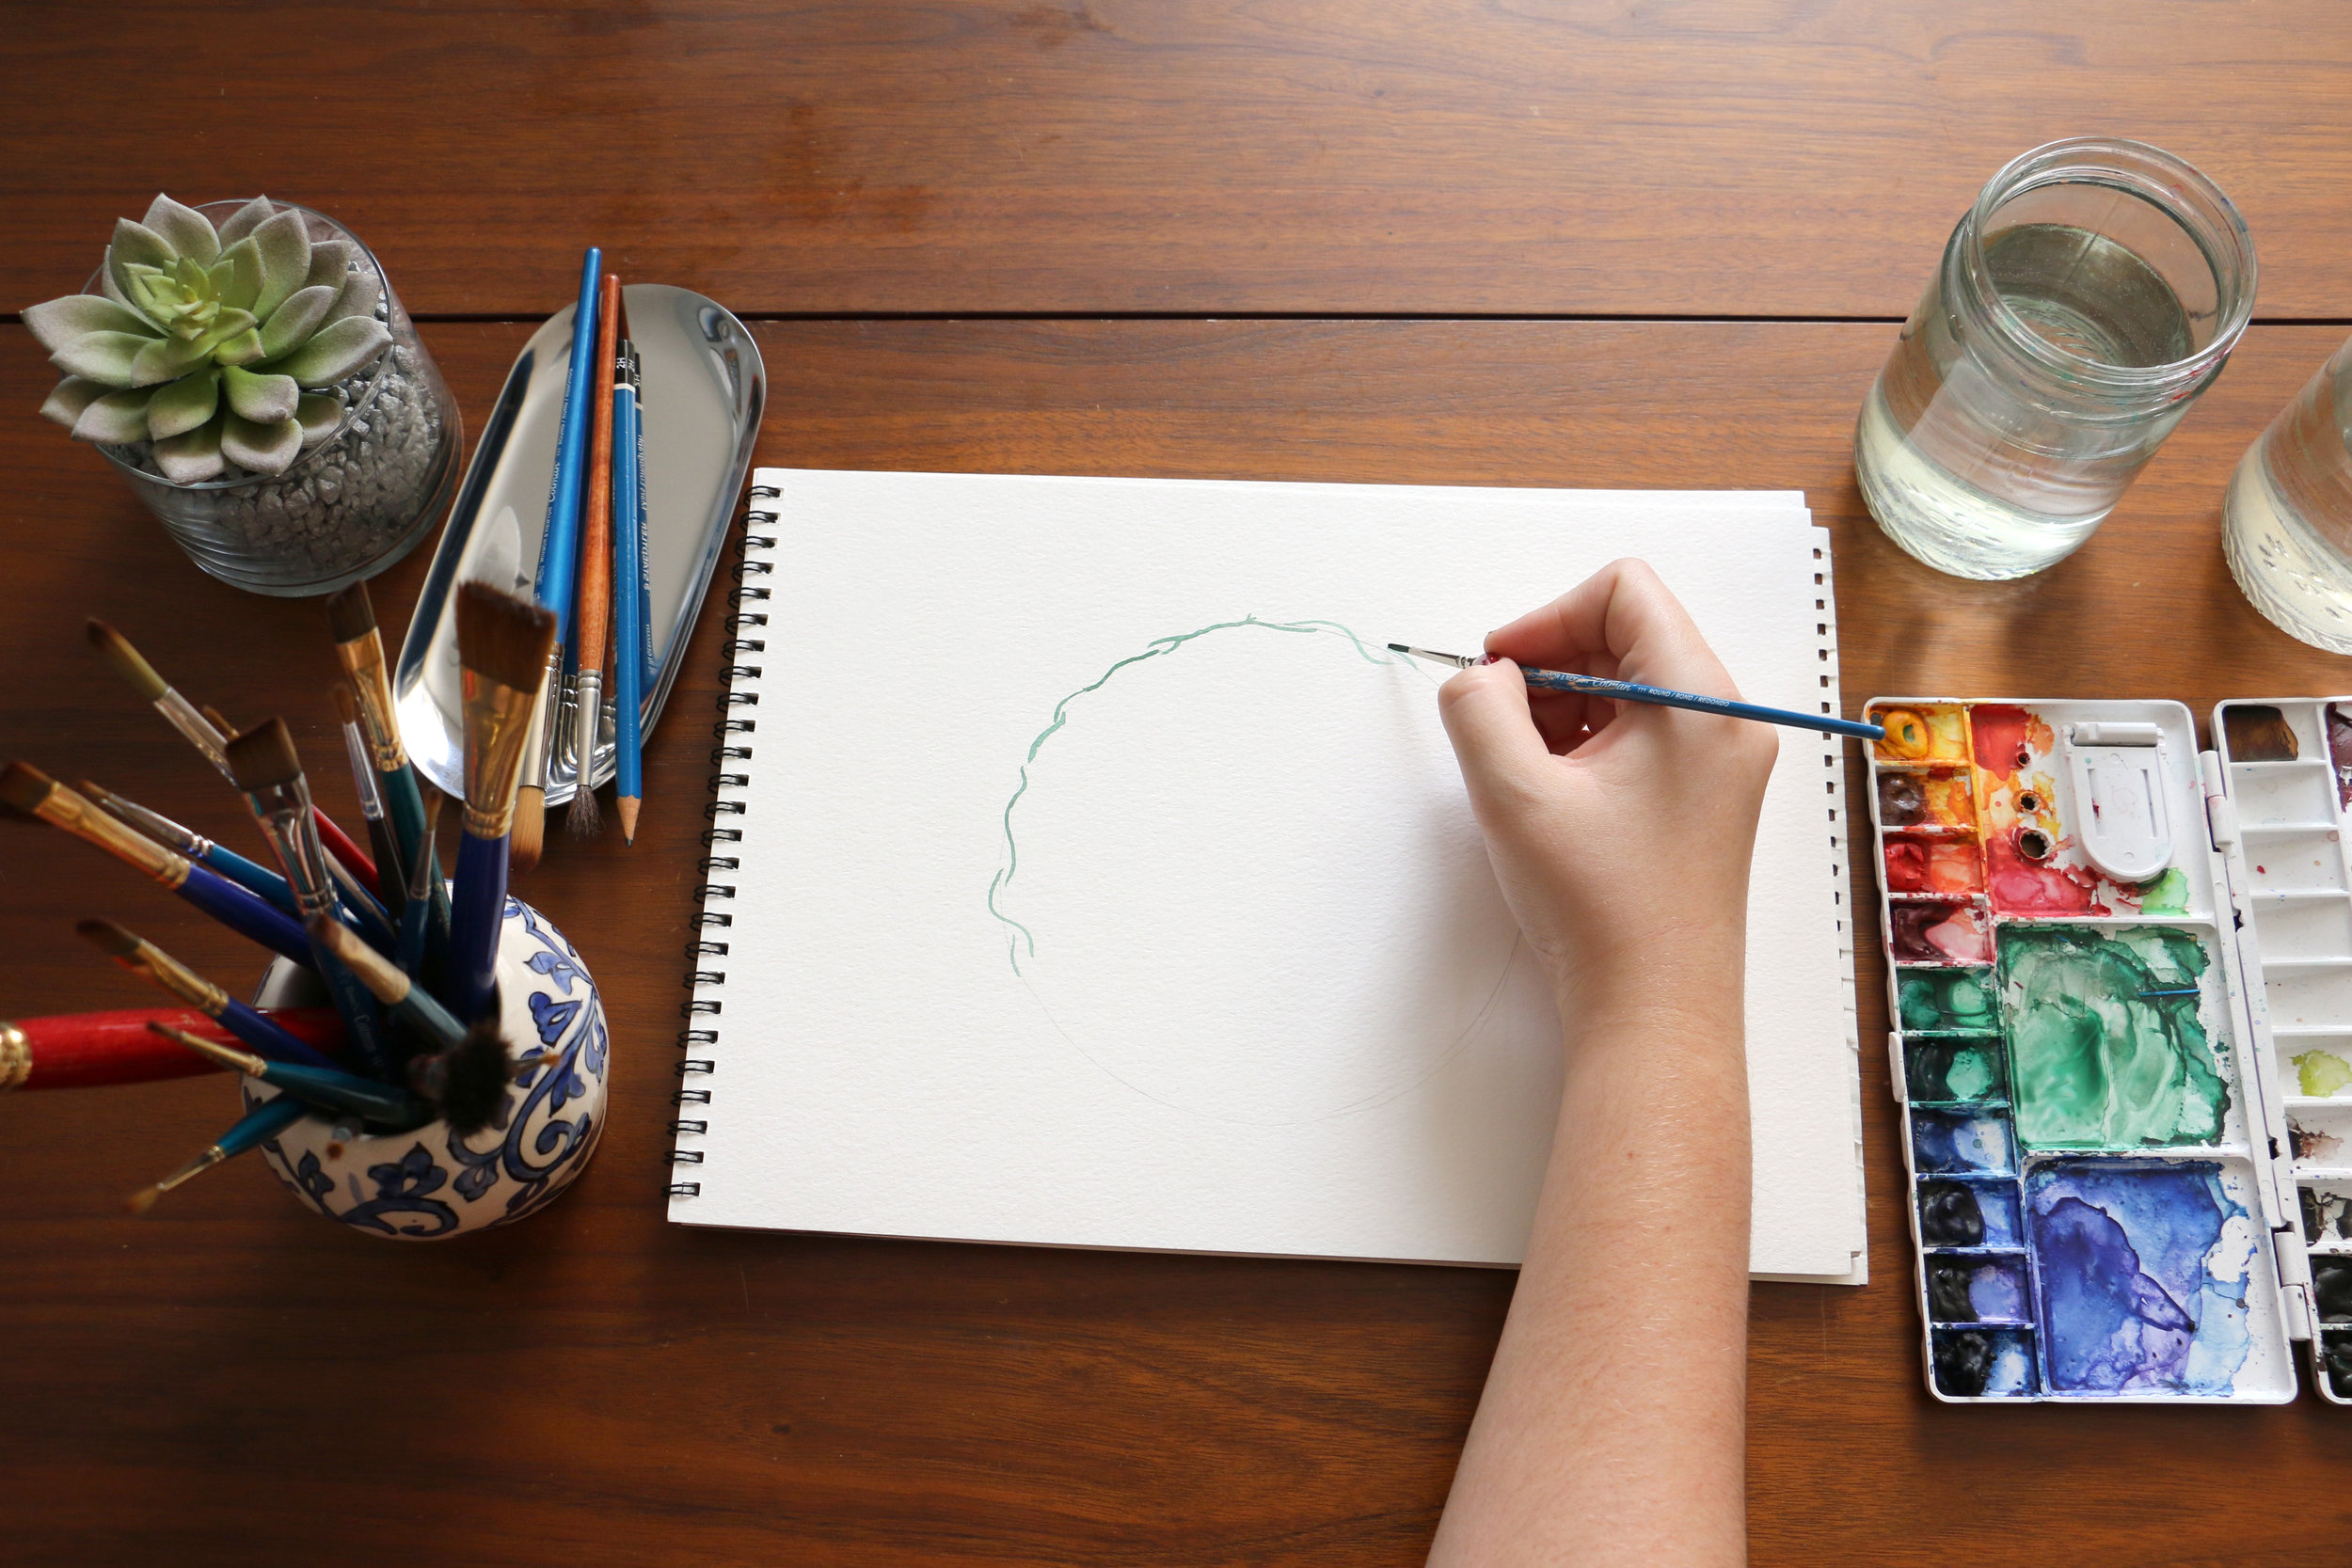
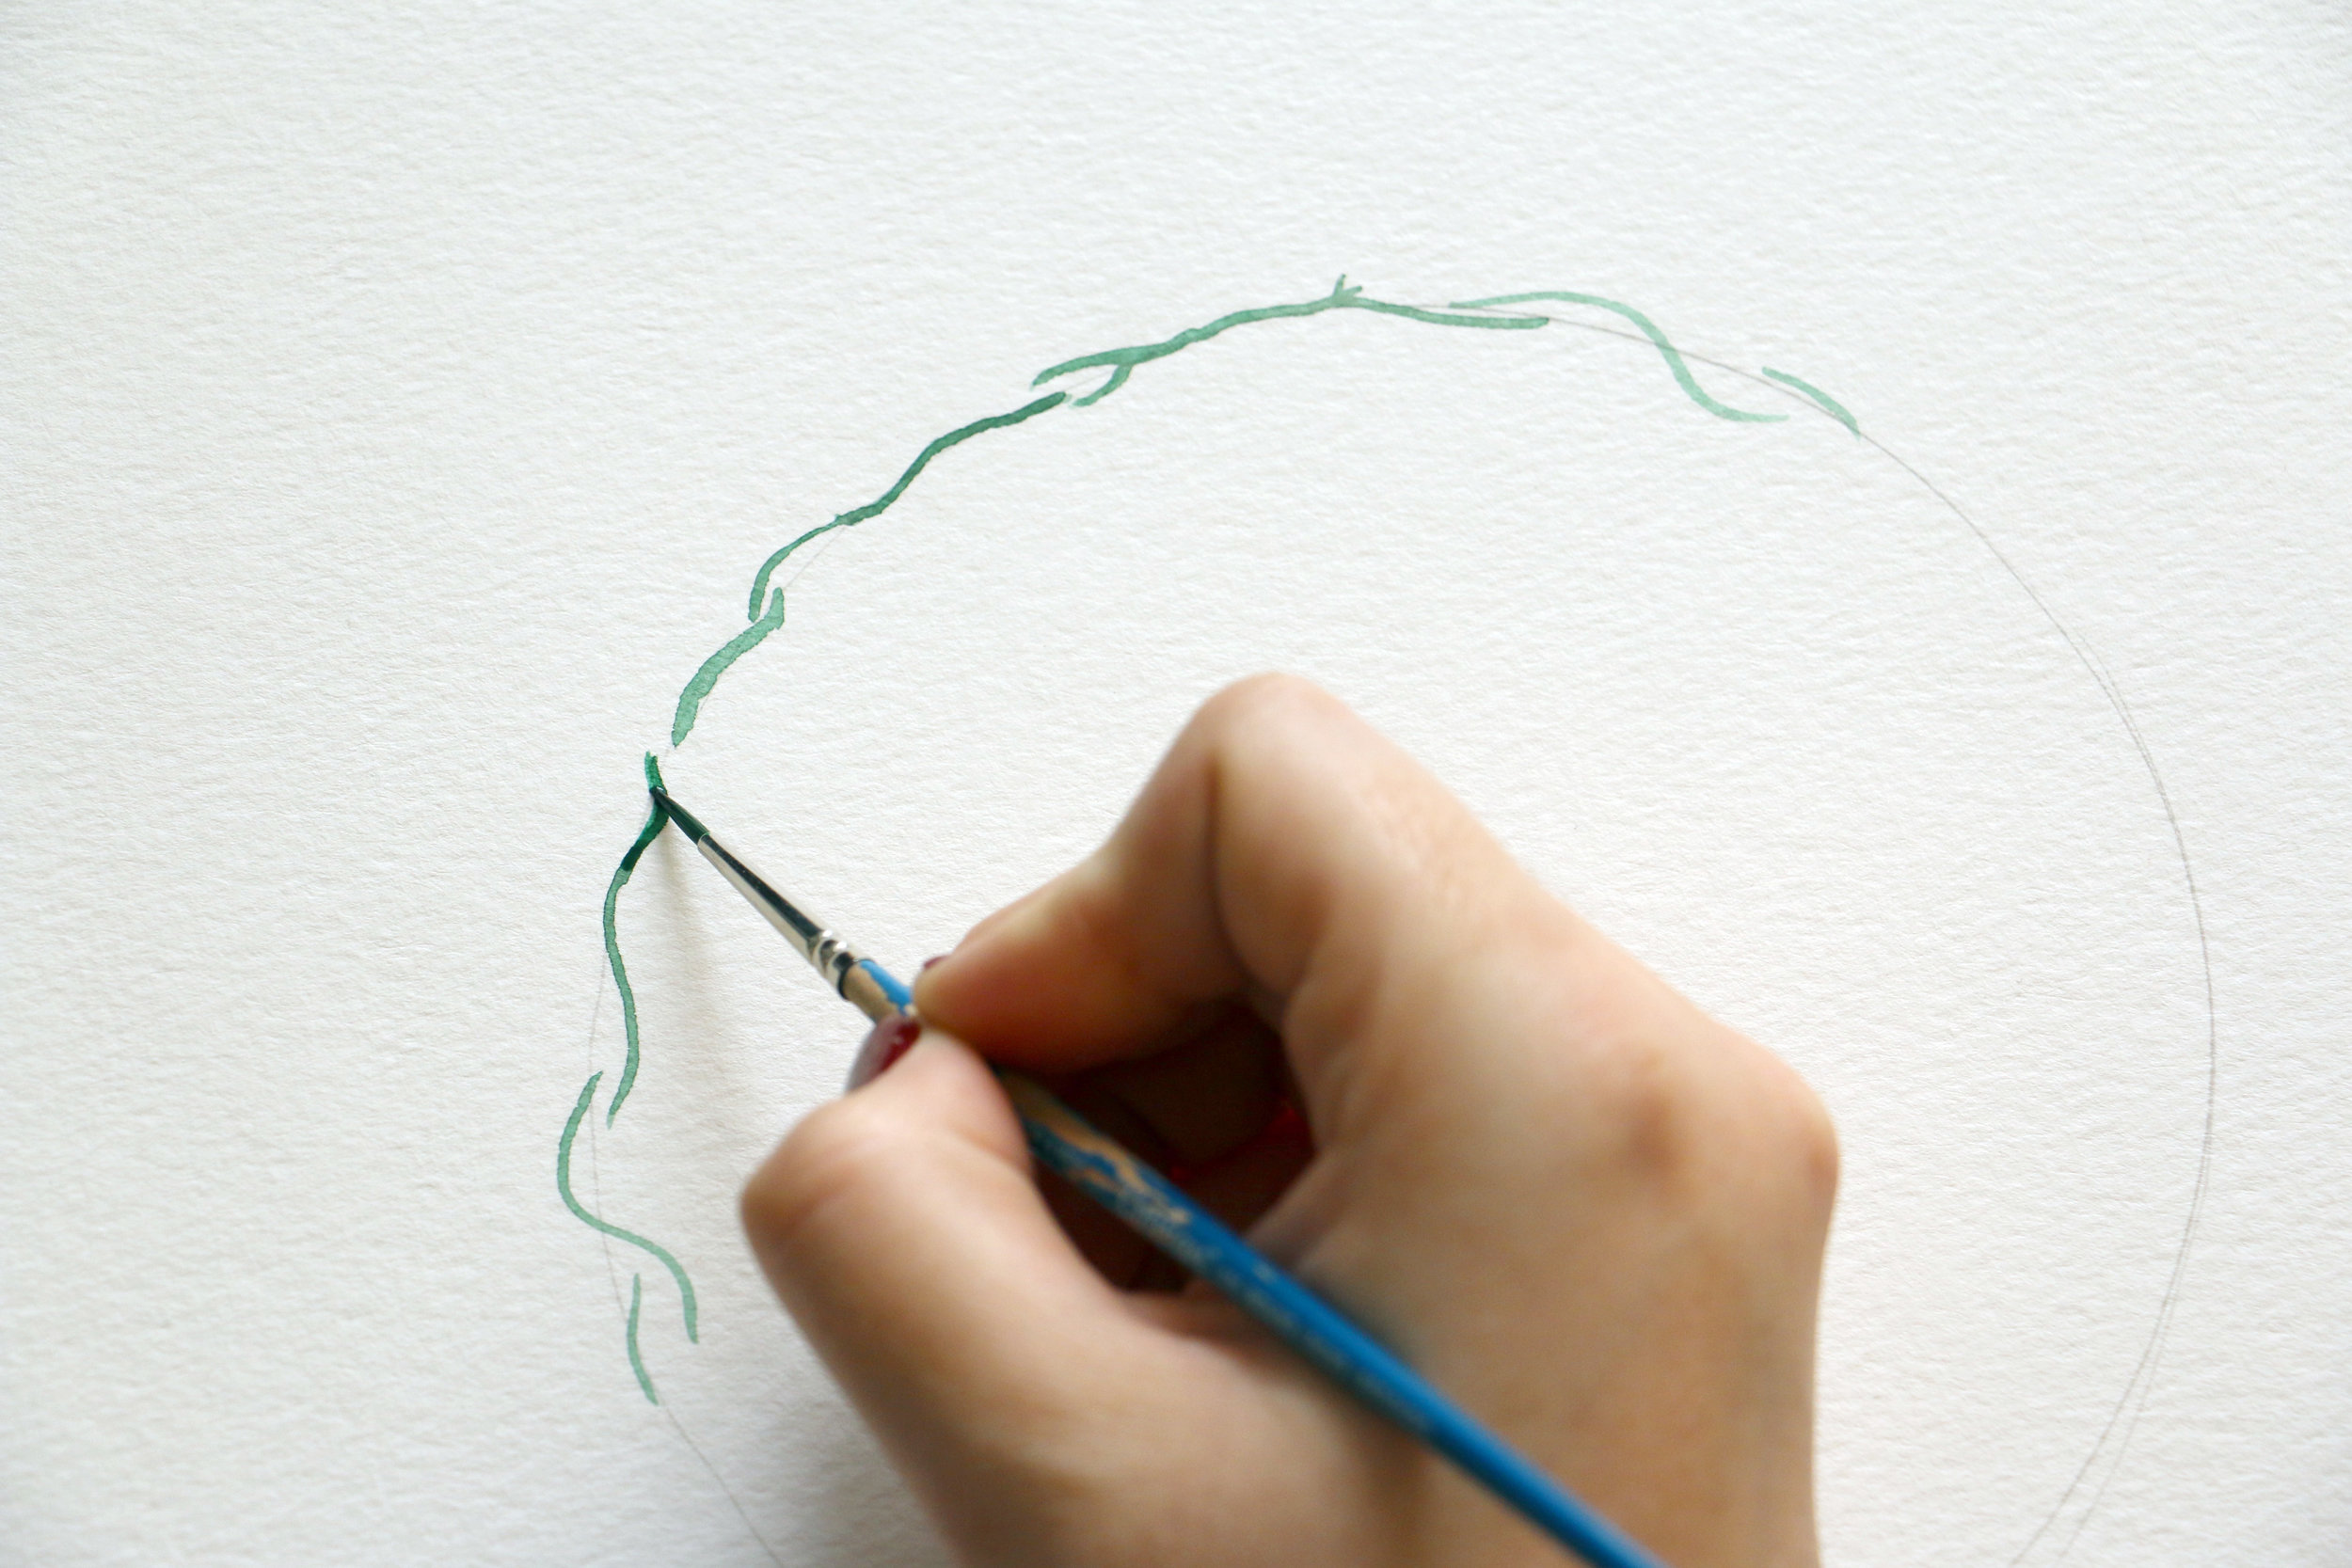
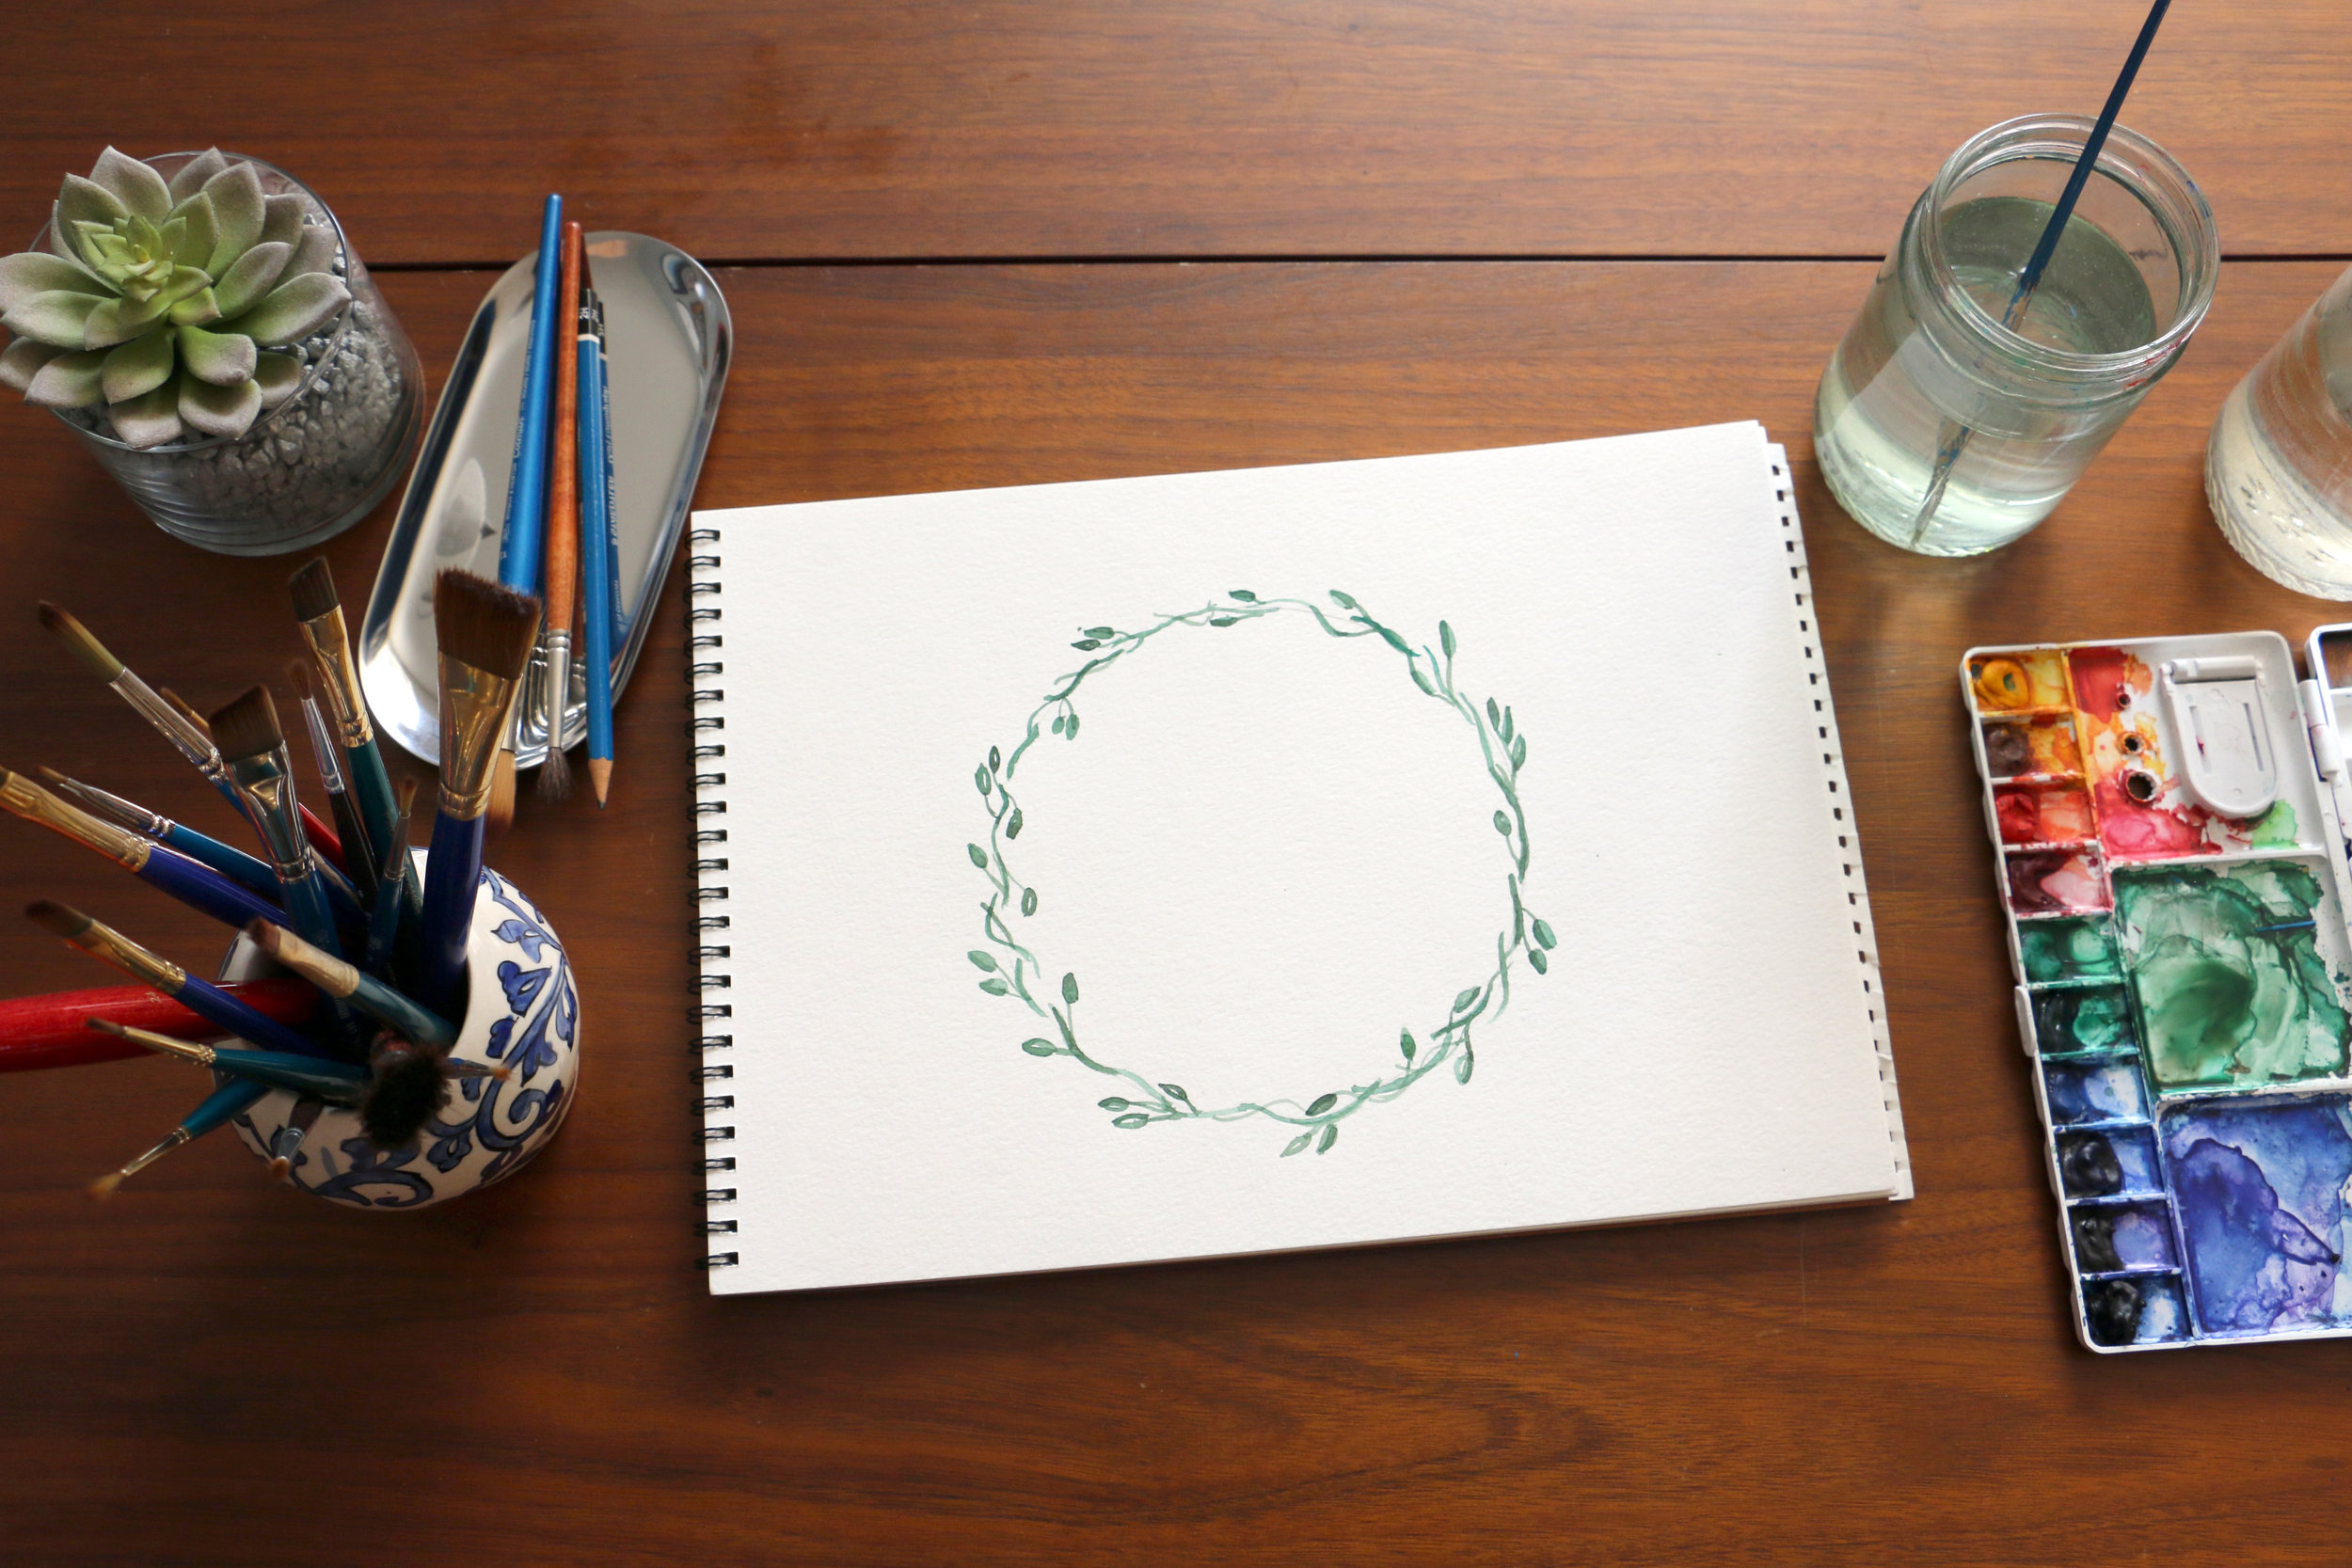
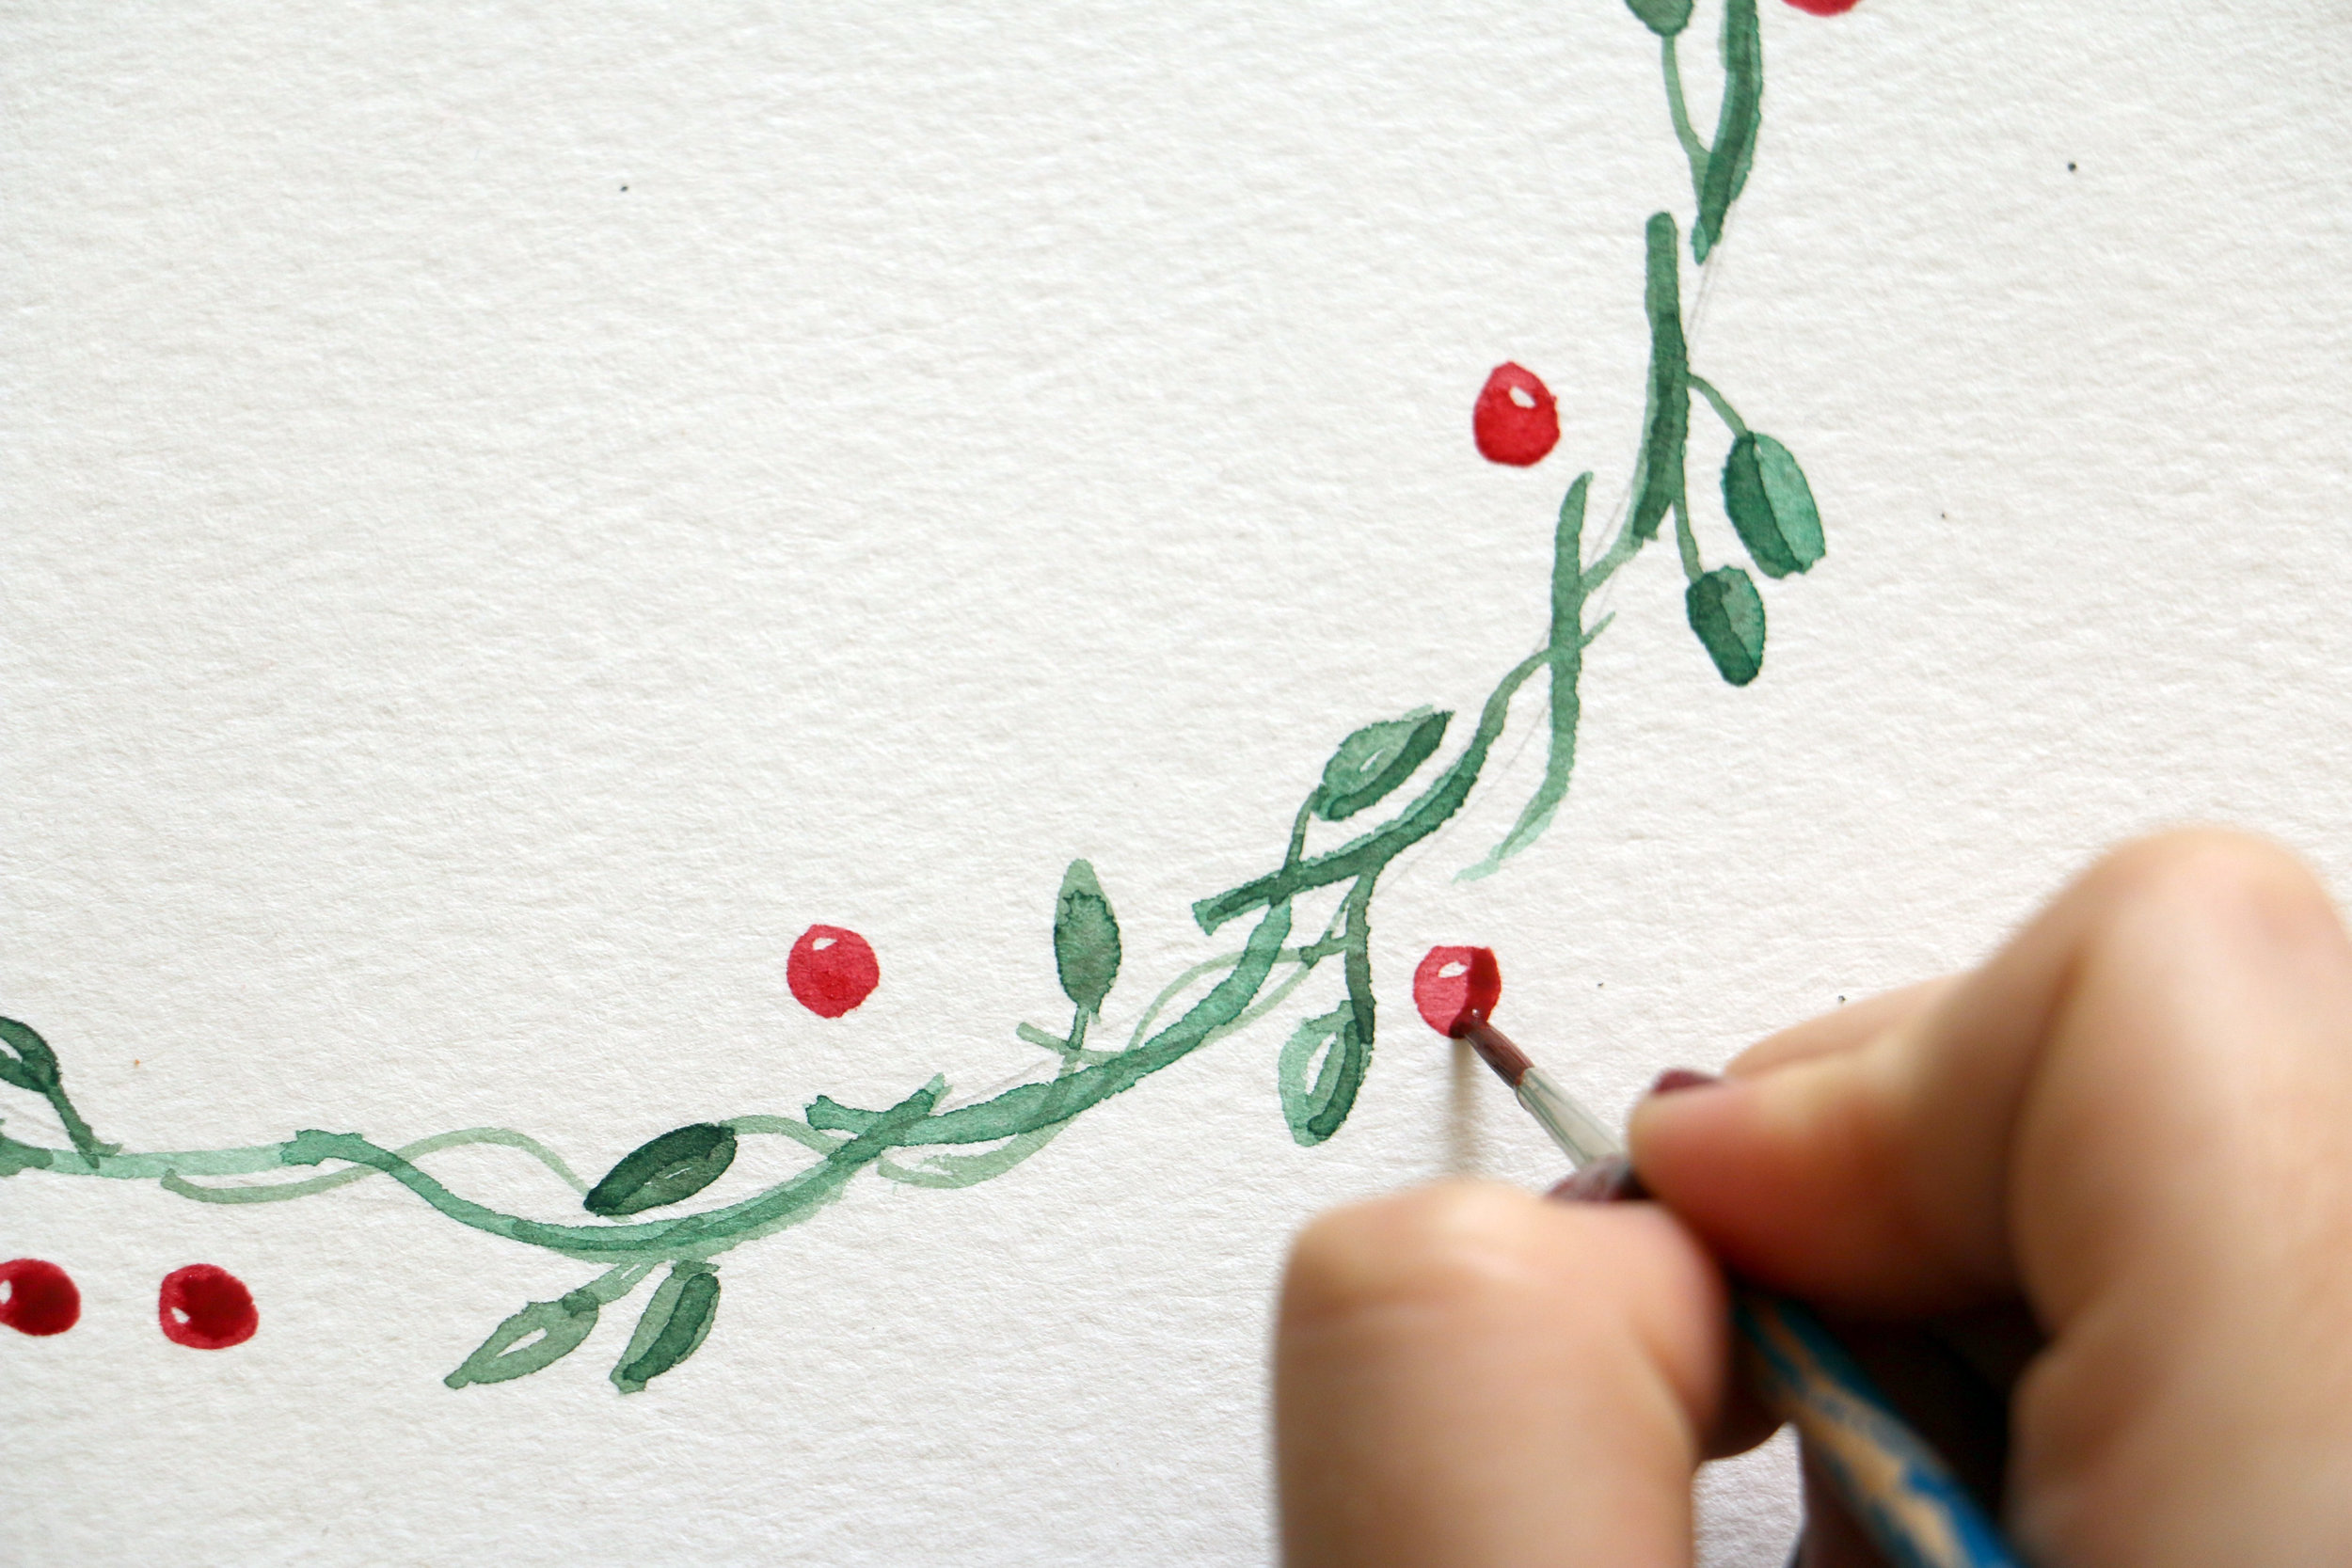
To begin, take a round object (I use a cereal bowl) and trace the shape onto your paper with a light pencil. Use this as a guide while you paint so your wreath isn't lopsided. Then, load your brush with a light green color and paint small strokes onto your page. These lines will be the base of your wreath so I tend to make them medium in length and wavy to represent the wreath's vines. You can always add more bulk to your wreath later so don't go overboard with this step. Once the first layer is dry, use a darker green (or just mix the green you have with some brown pigment), and trace over some of the vines you painted to give shadow and depth to the image. I typically paint over 30-50% of my vines with a darker color.
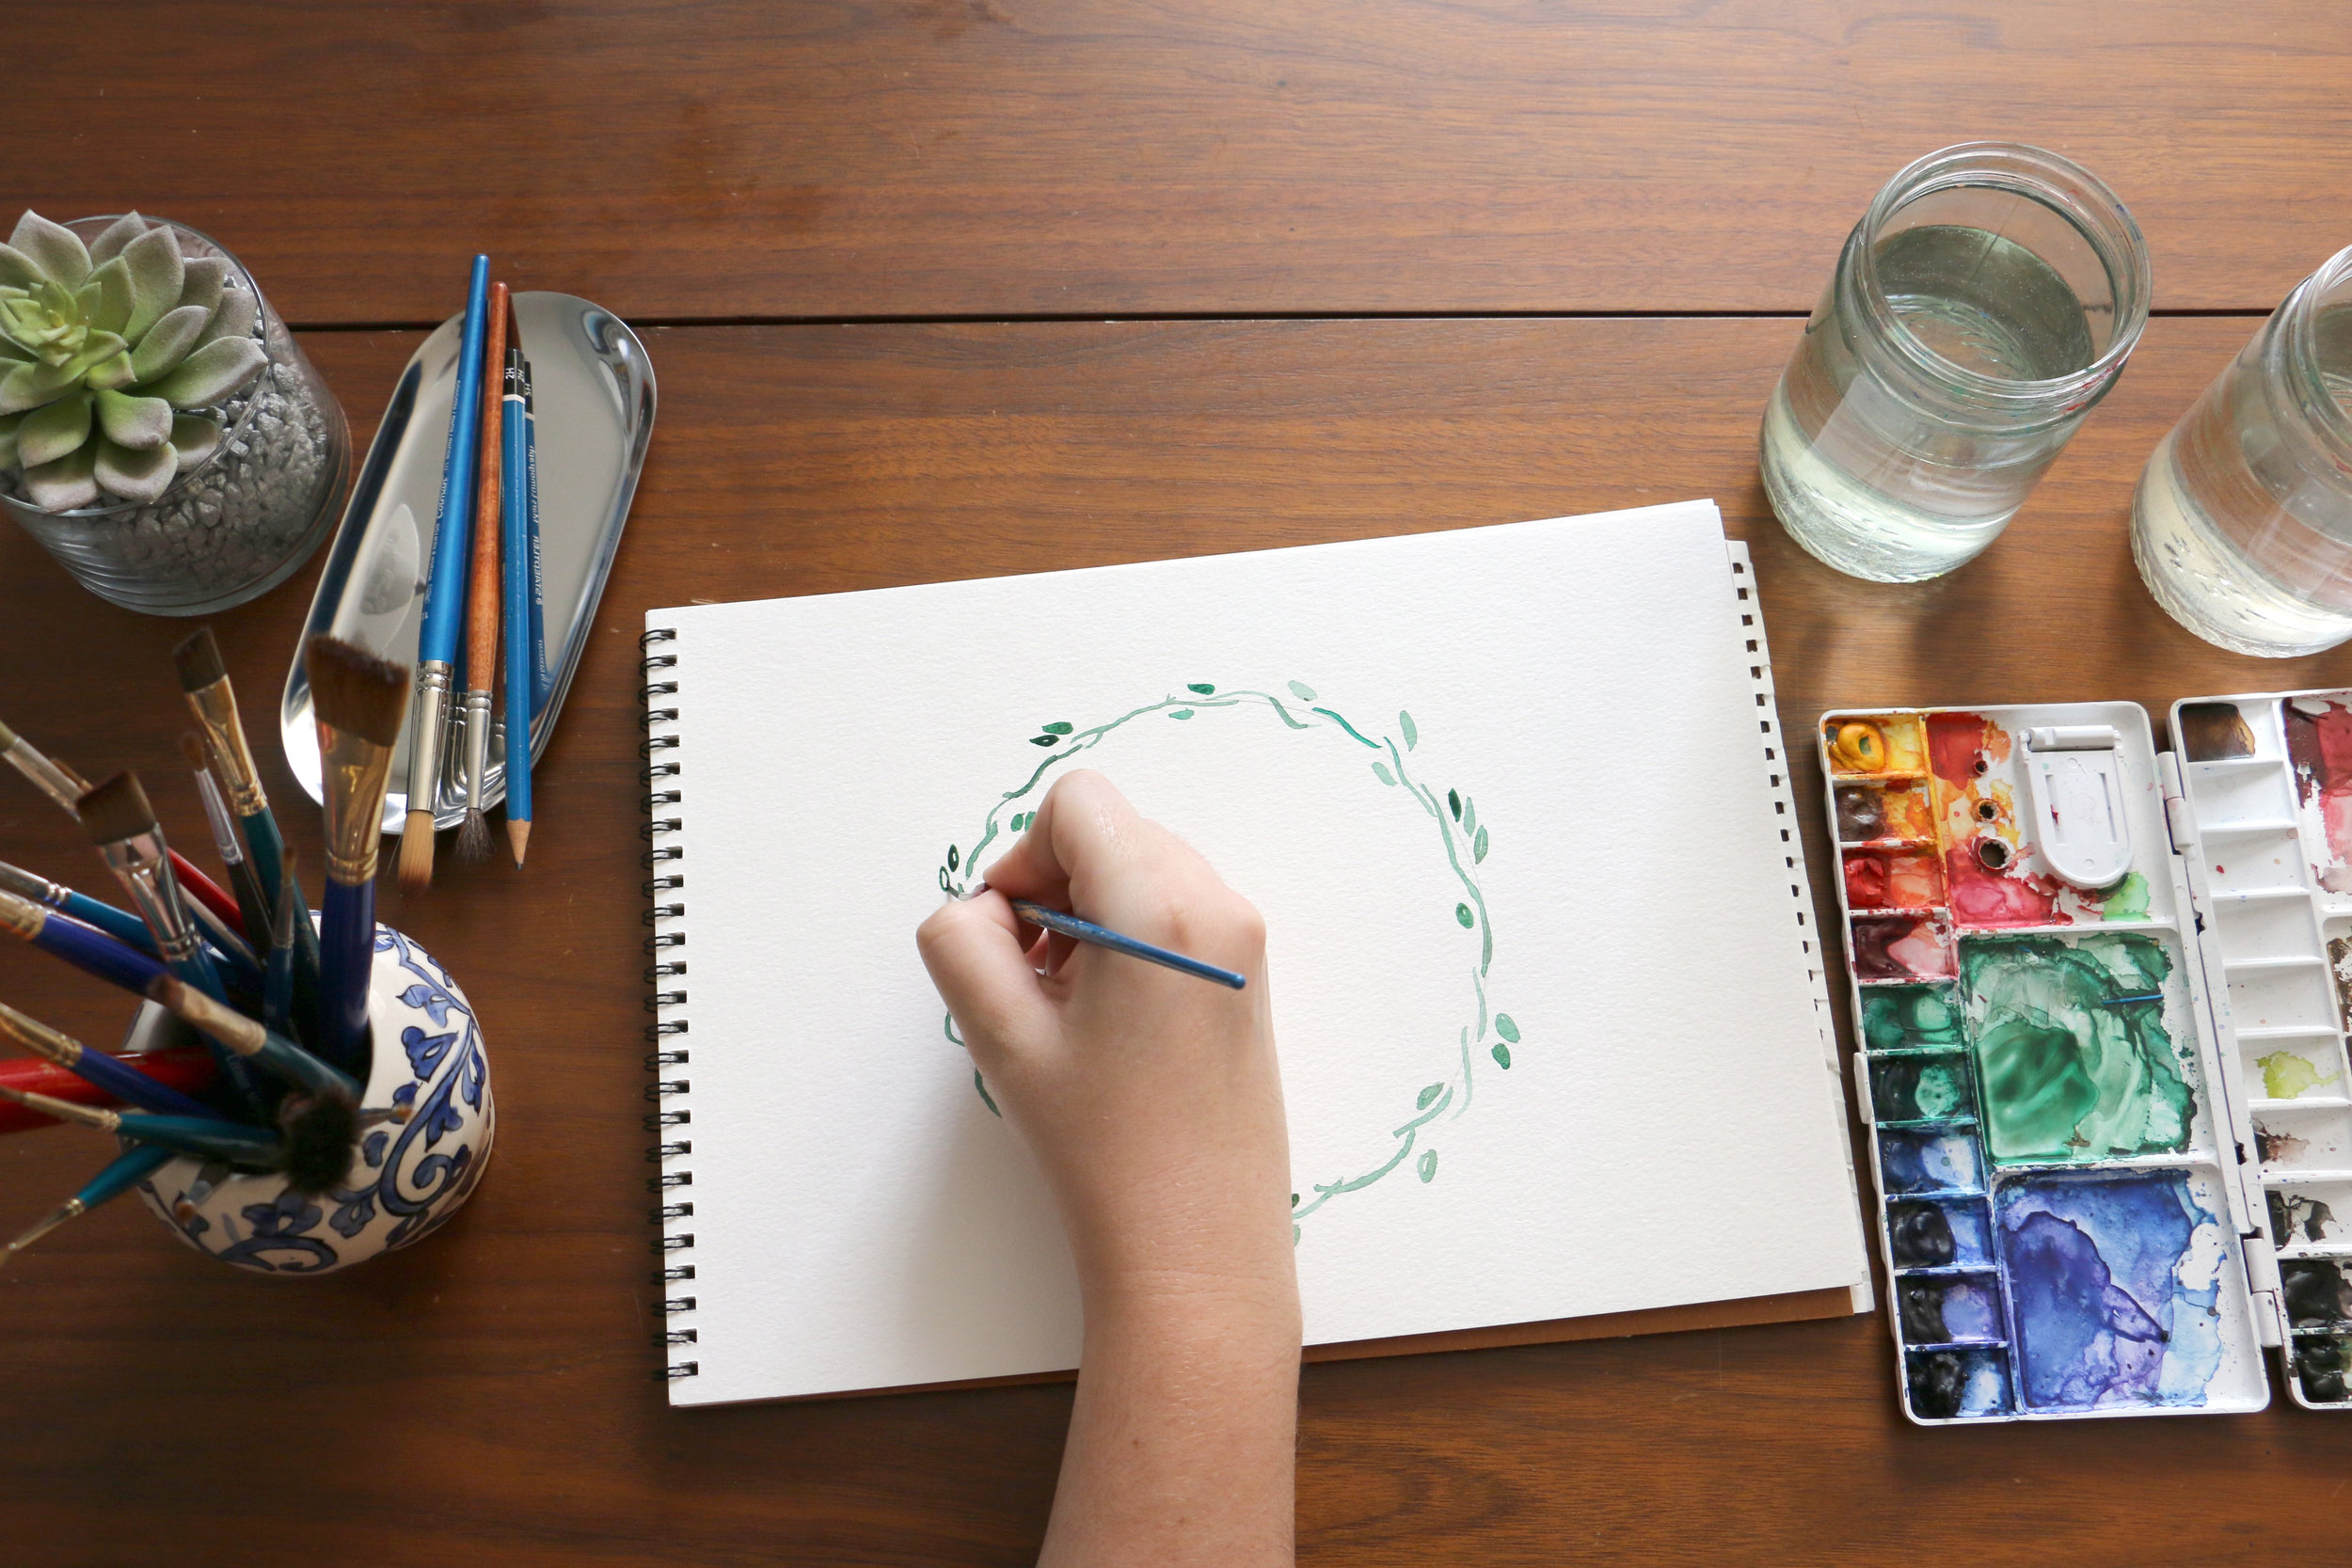
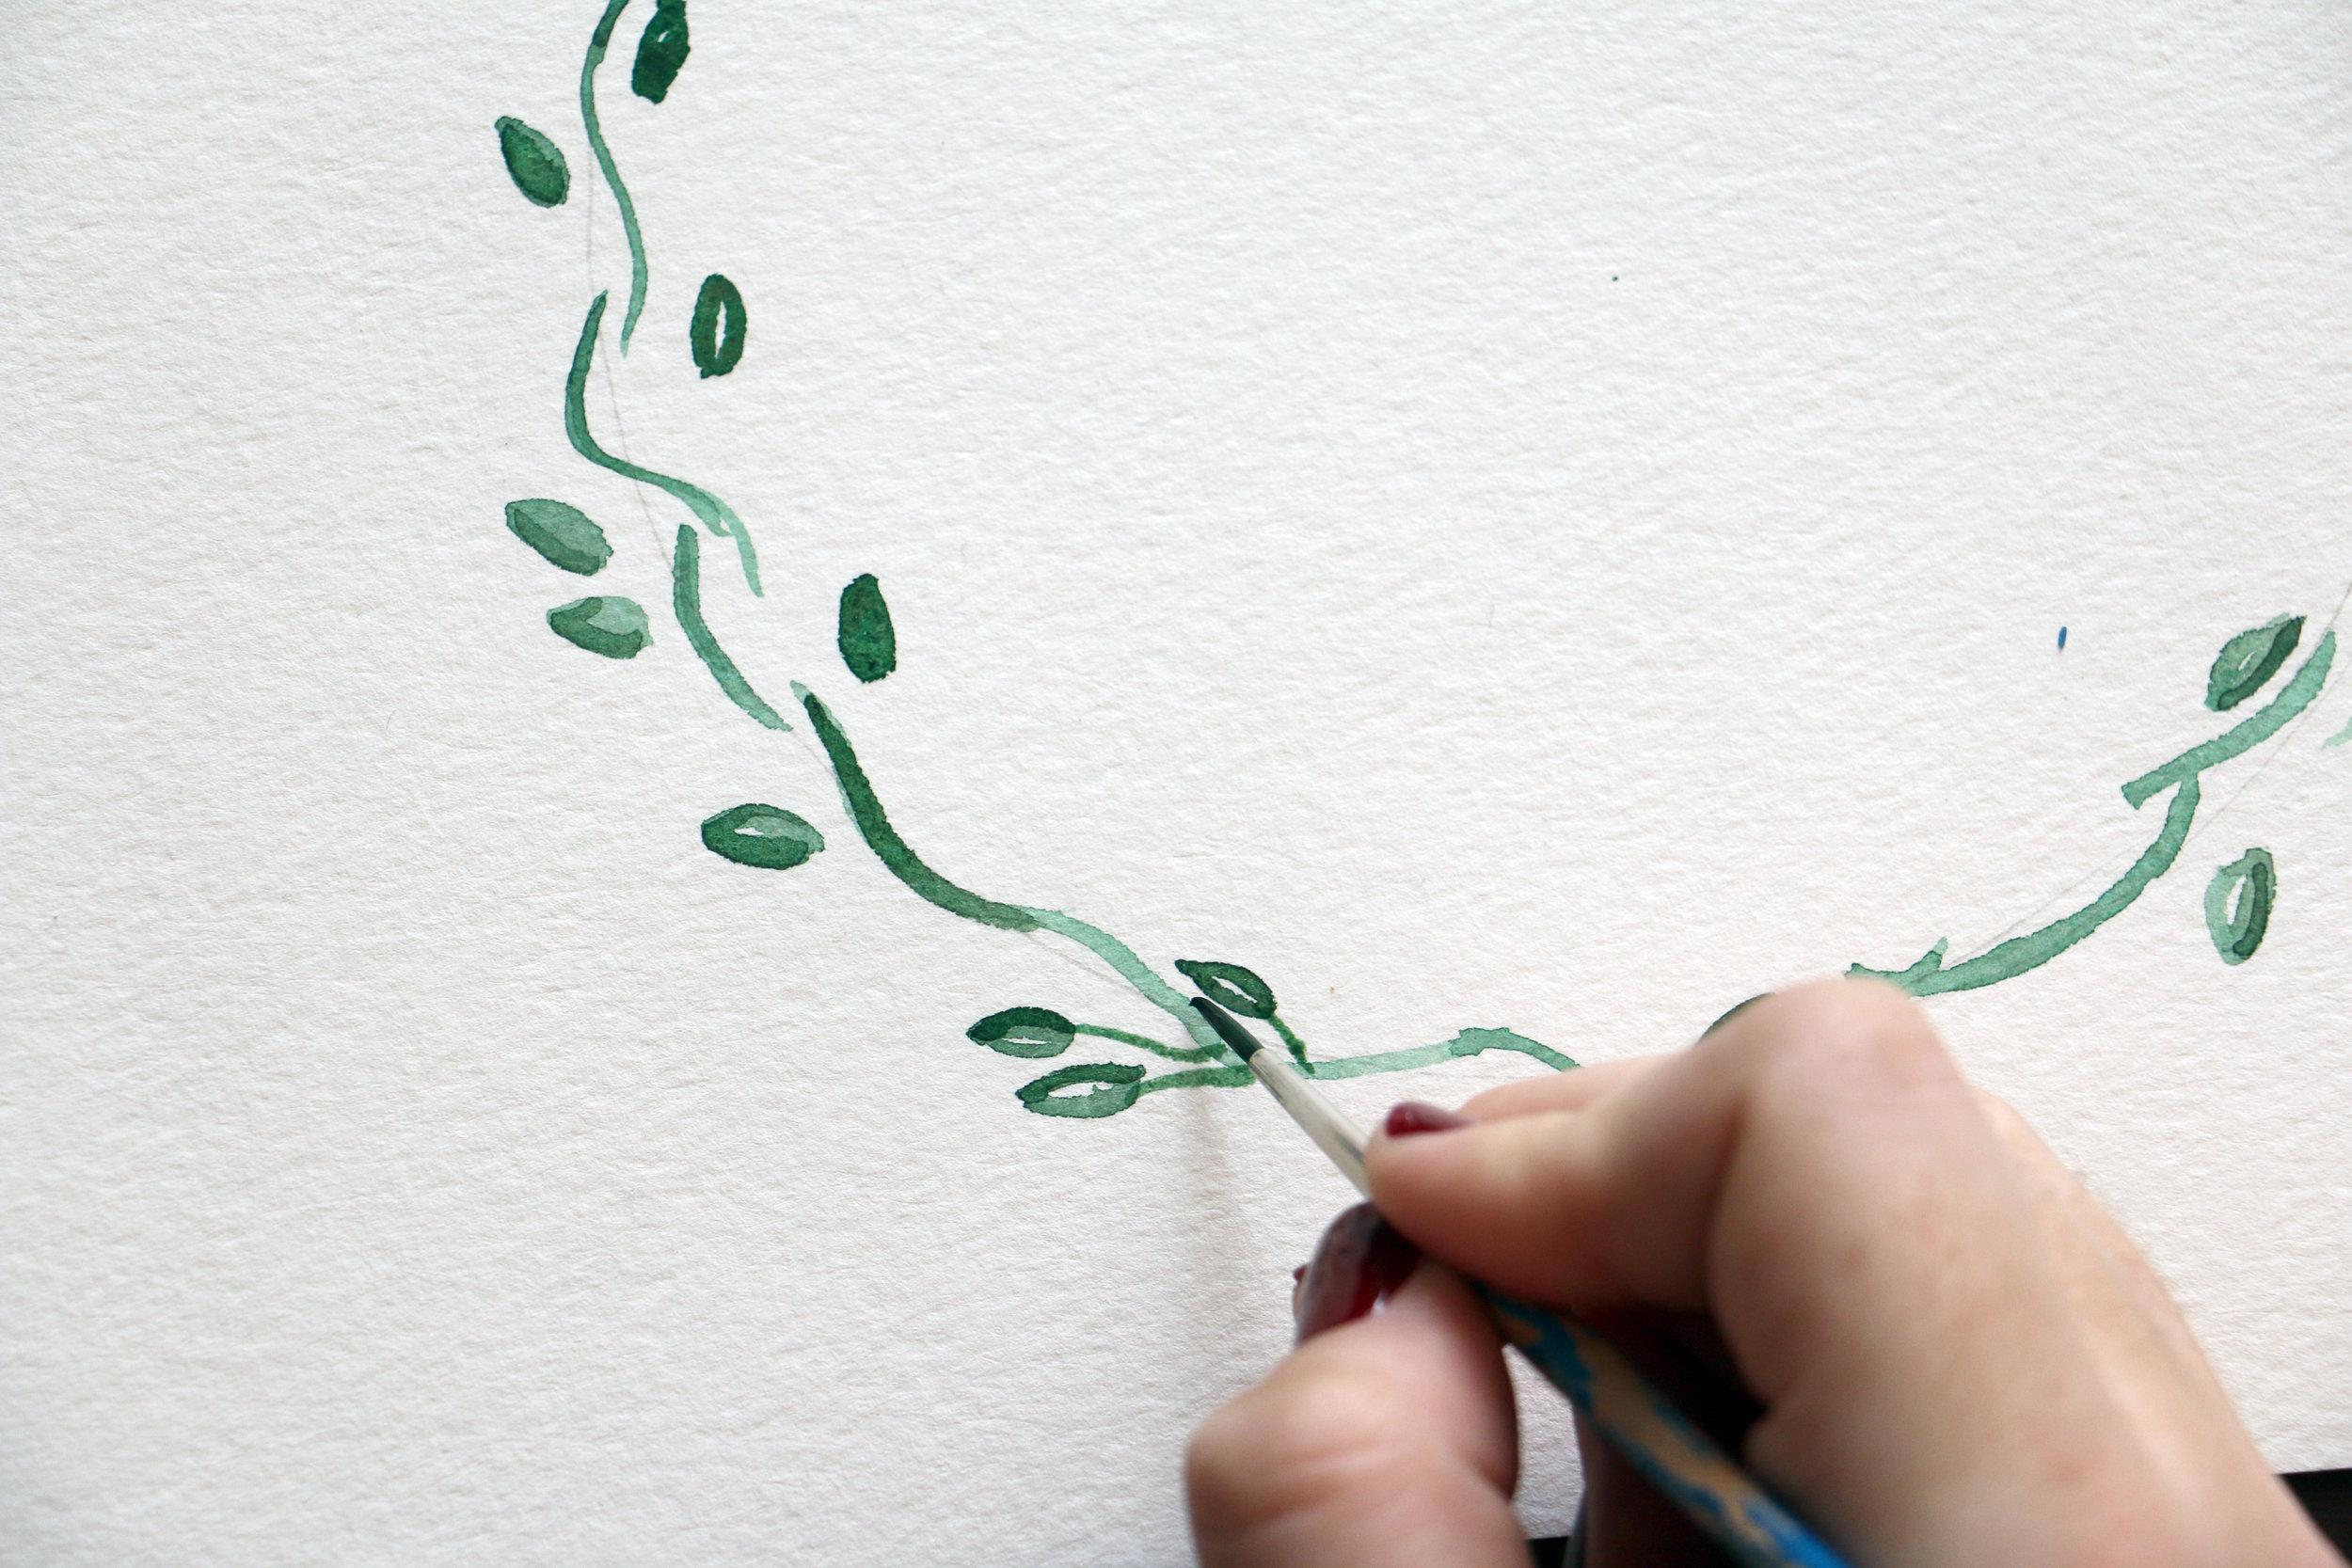
Once you've painted vines all around your wreath, add some leaves in the lighter green color. Depending on the day, I'll add just a couple leaves here and there, or add them all over the place. Try it out and see what you like best! Rotate your page as you paint so your leaves face different directions. My leaves for this type of wreath are very simple, just a few strokes in an oval shape. I also try to leave some white space in the middle as a highlight.
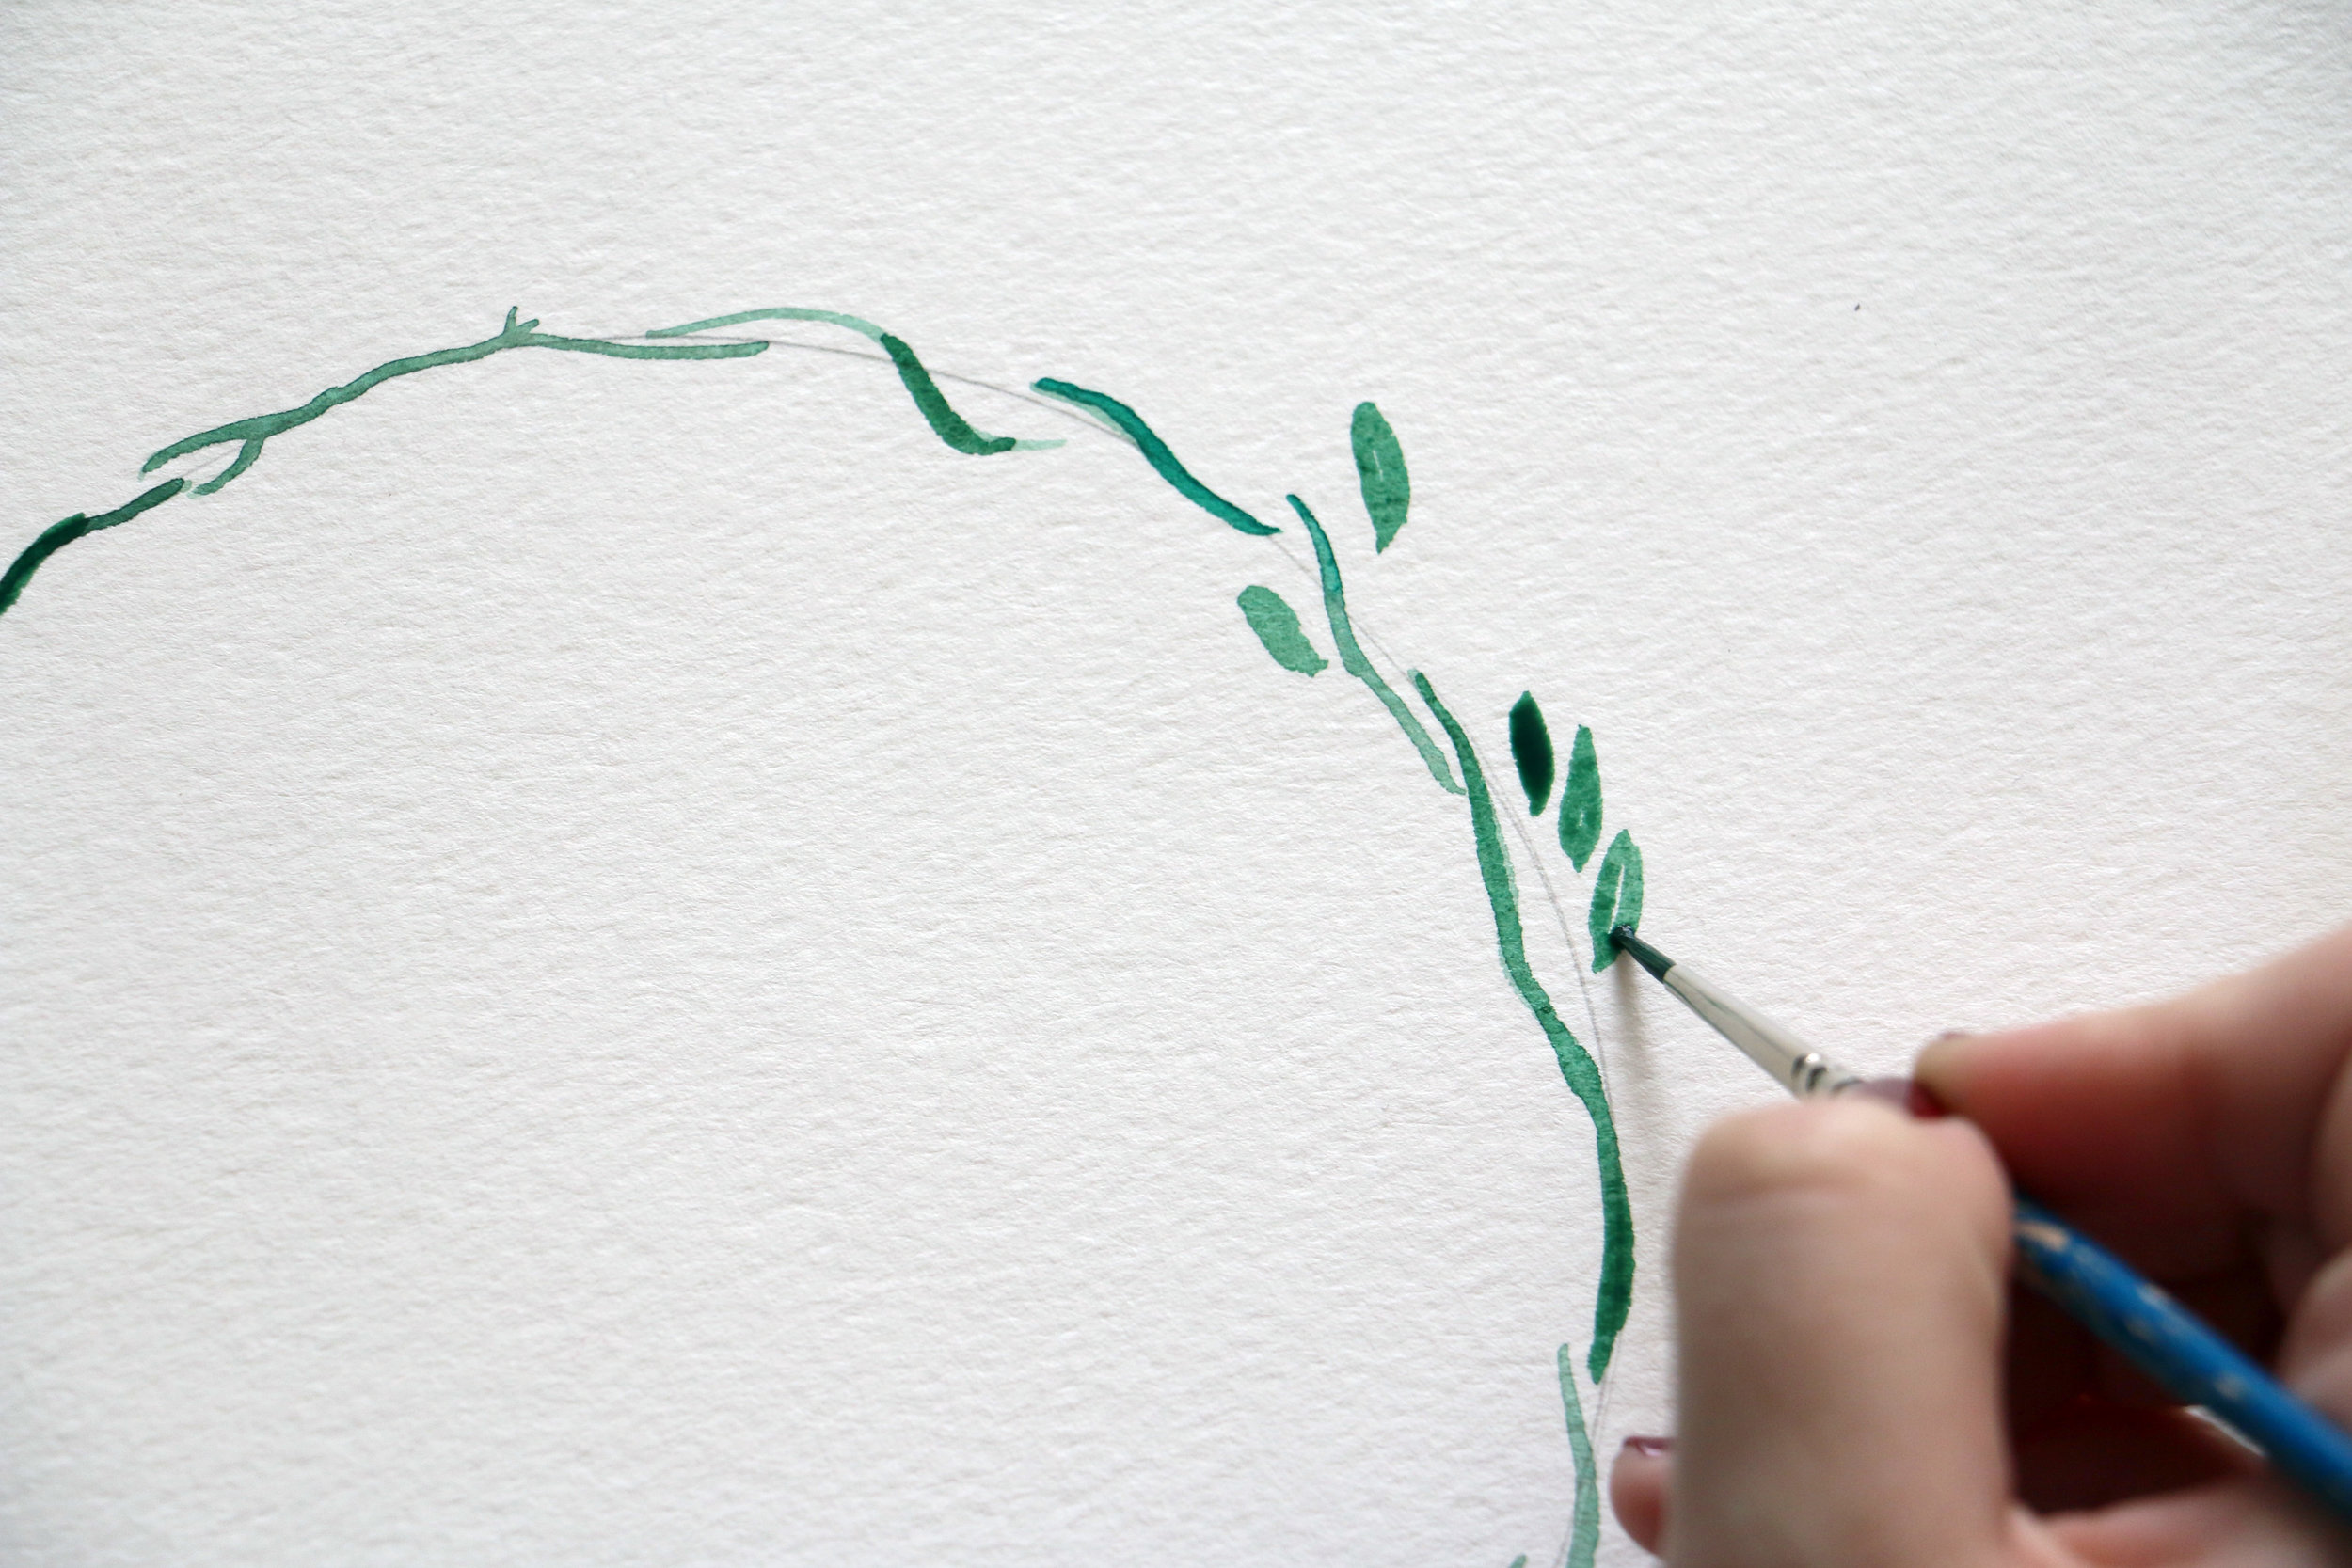
Once this layer is dry, use a darker green to paint some shadow on the leaves. For smaller leaves and watercolors like this one, I just paint a single stroke on one side of the leaf.

Next, add thin lines to connect the leaves to the vines you painted earlier. Sometimes I'll draw one simple line to the vine, other times I'll connect multiples leaves together and then paint one single stroke from the leaves to the vine.
Now, for the fun part: the berries! Load your brush with the most vibrant red you have and start adding small circles of red to your wreath. Leave a small space in the corner of your berry for the paper to show through as highlight. Try to keep this highlight in the same general area for all your berries so it's uniform. I typically don't plan out where I'm going to paint my berries but, if you'd like, you can sketch out these locations before you paint to make sure you have a good balance of red on the wreath.
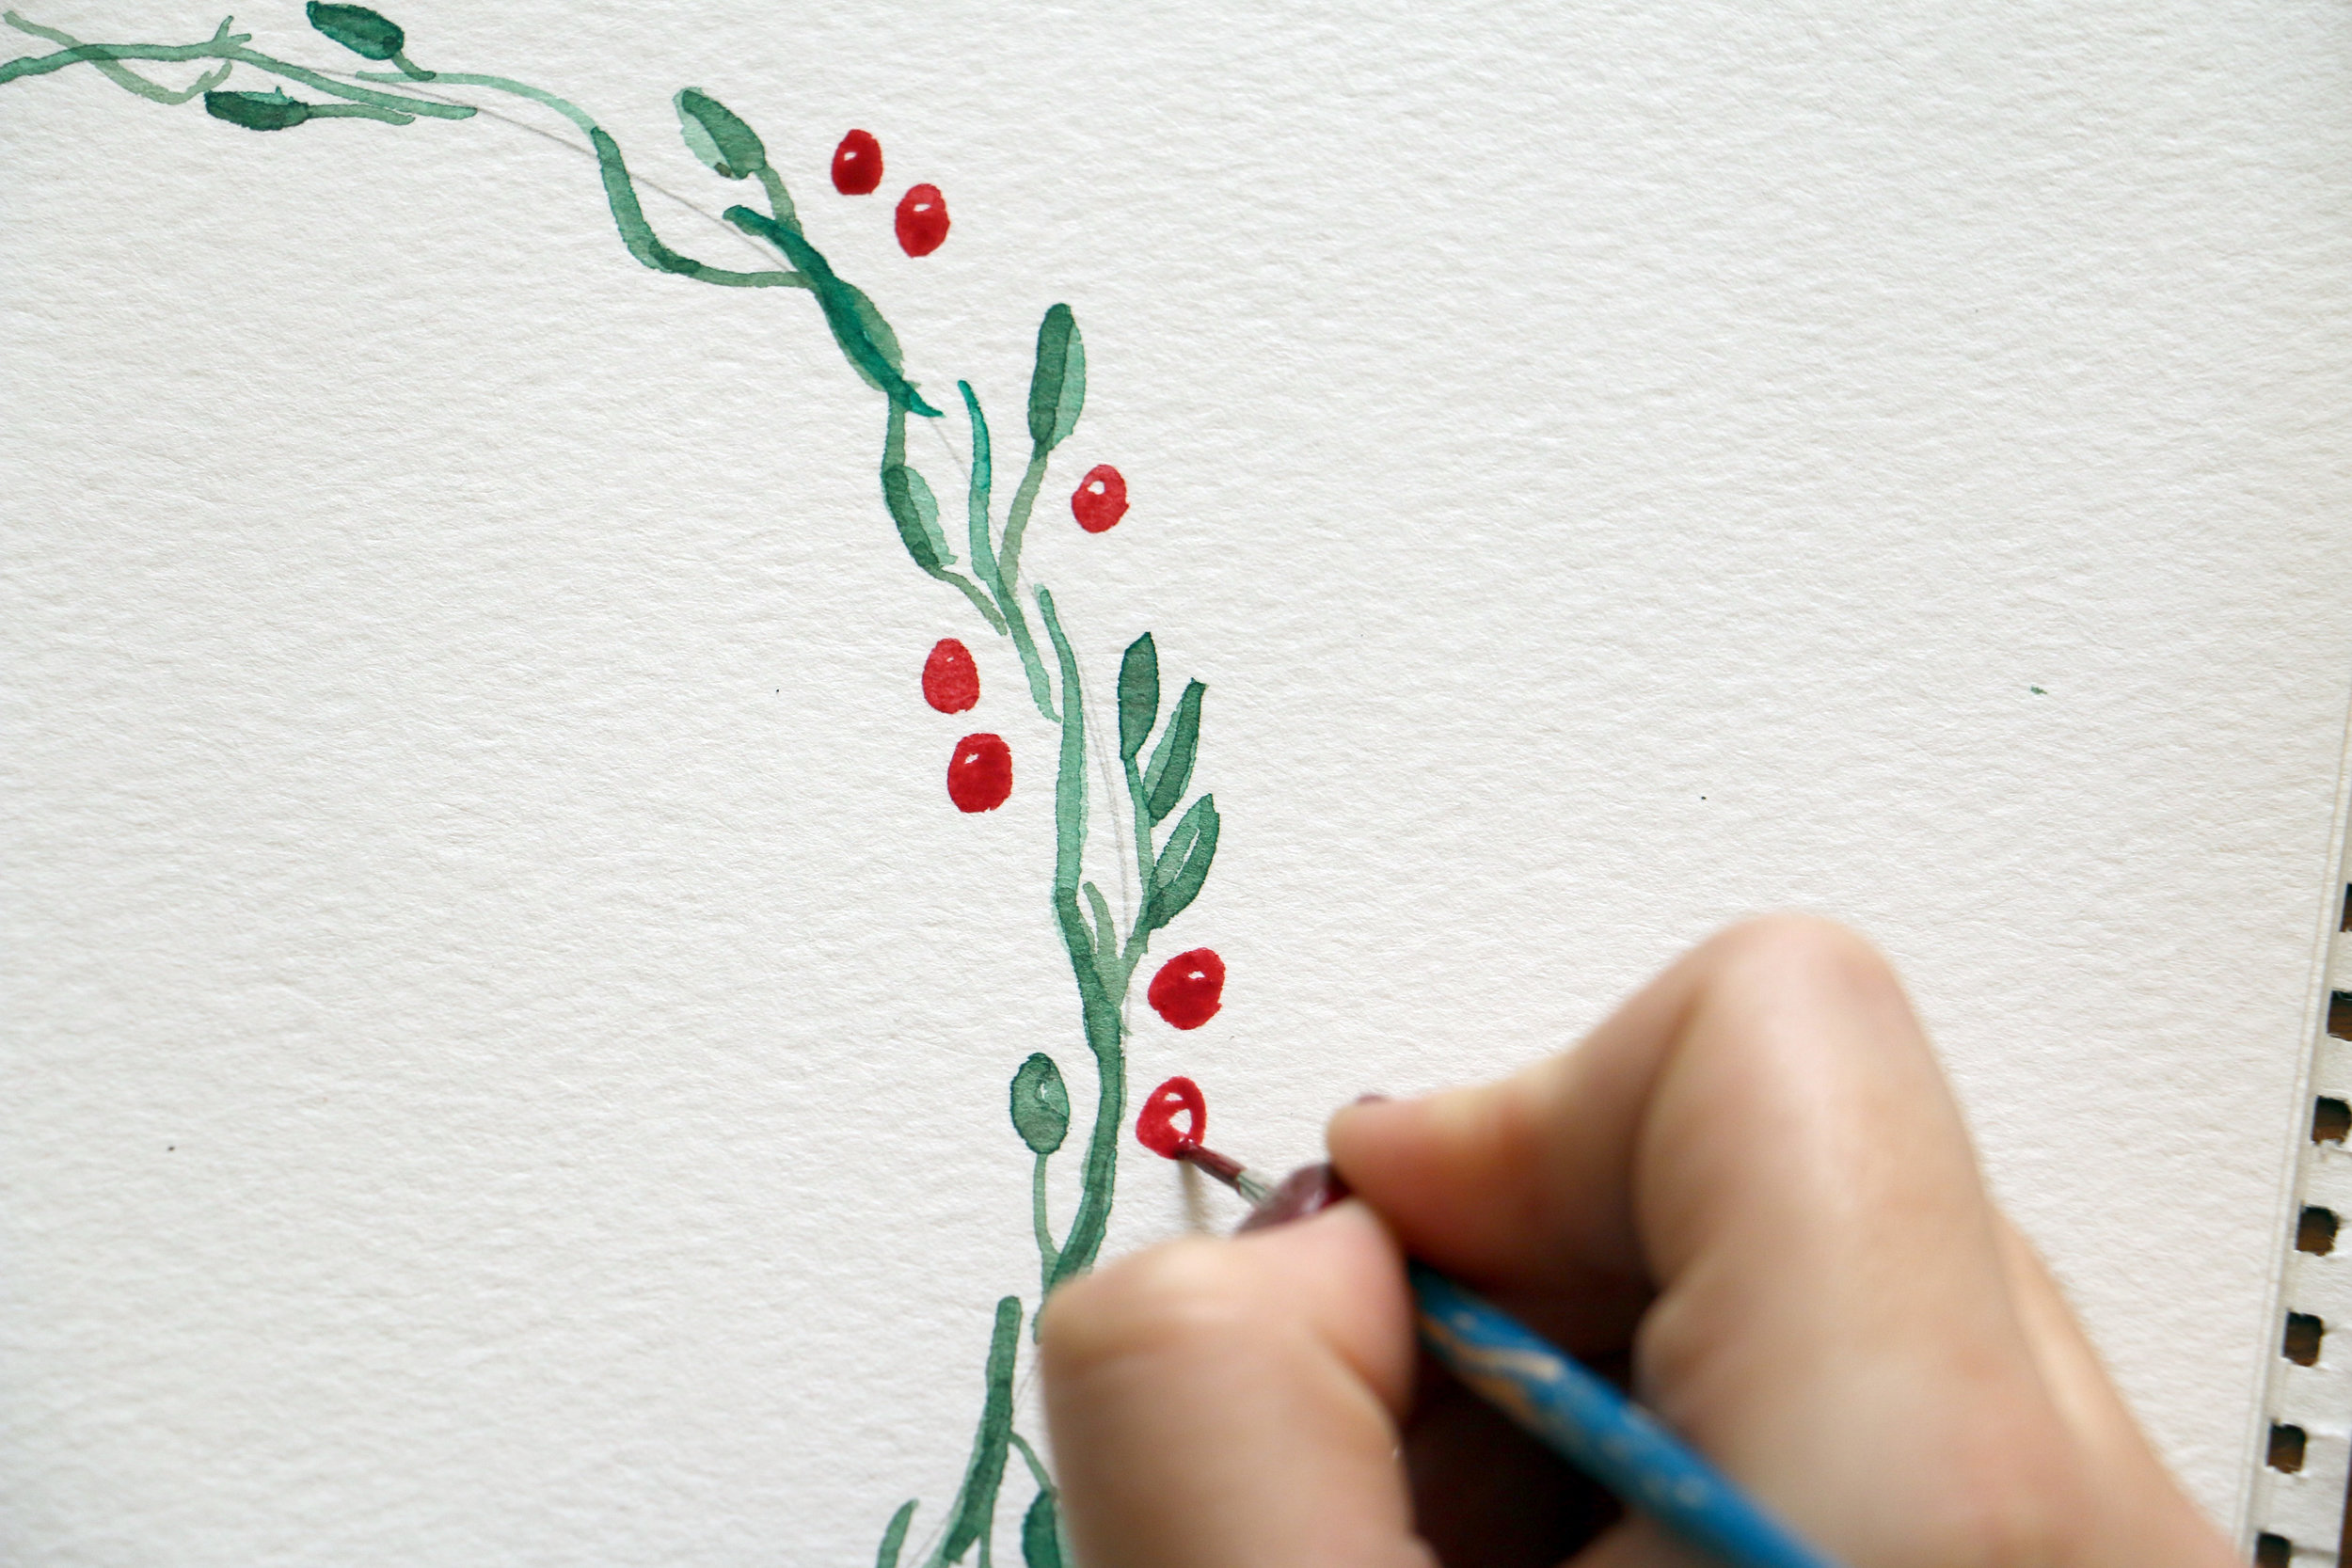
Next, mix your red paint with some brown to get a nice, burgundy color. Once the first berry layer is dry, add a small stroke of burgundy to the side opposite the white highlight. Voila! Highlight, shadow and depth!
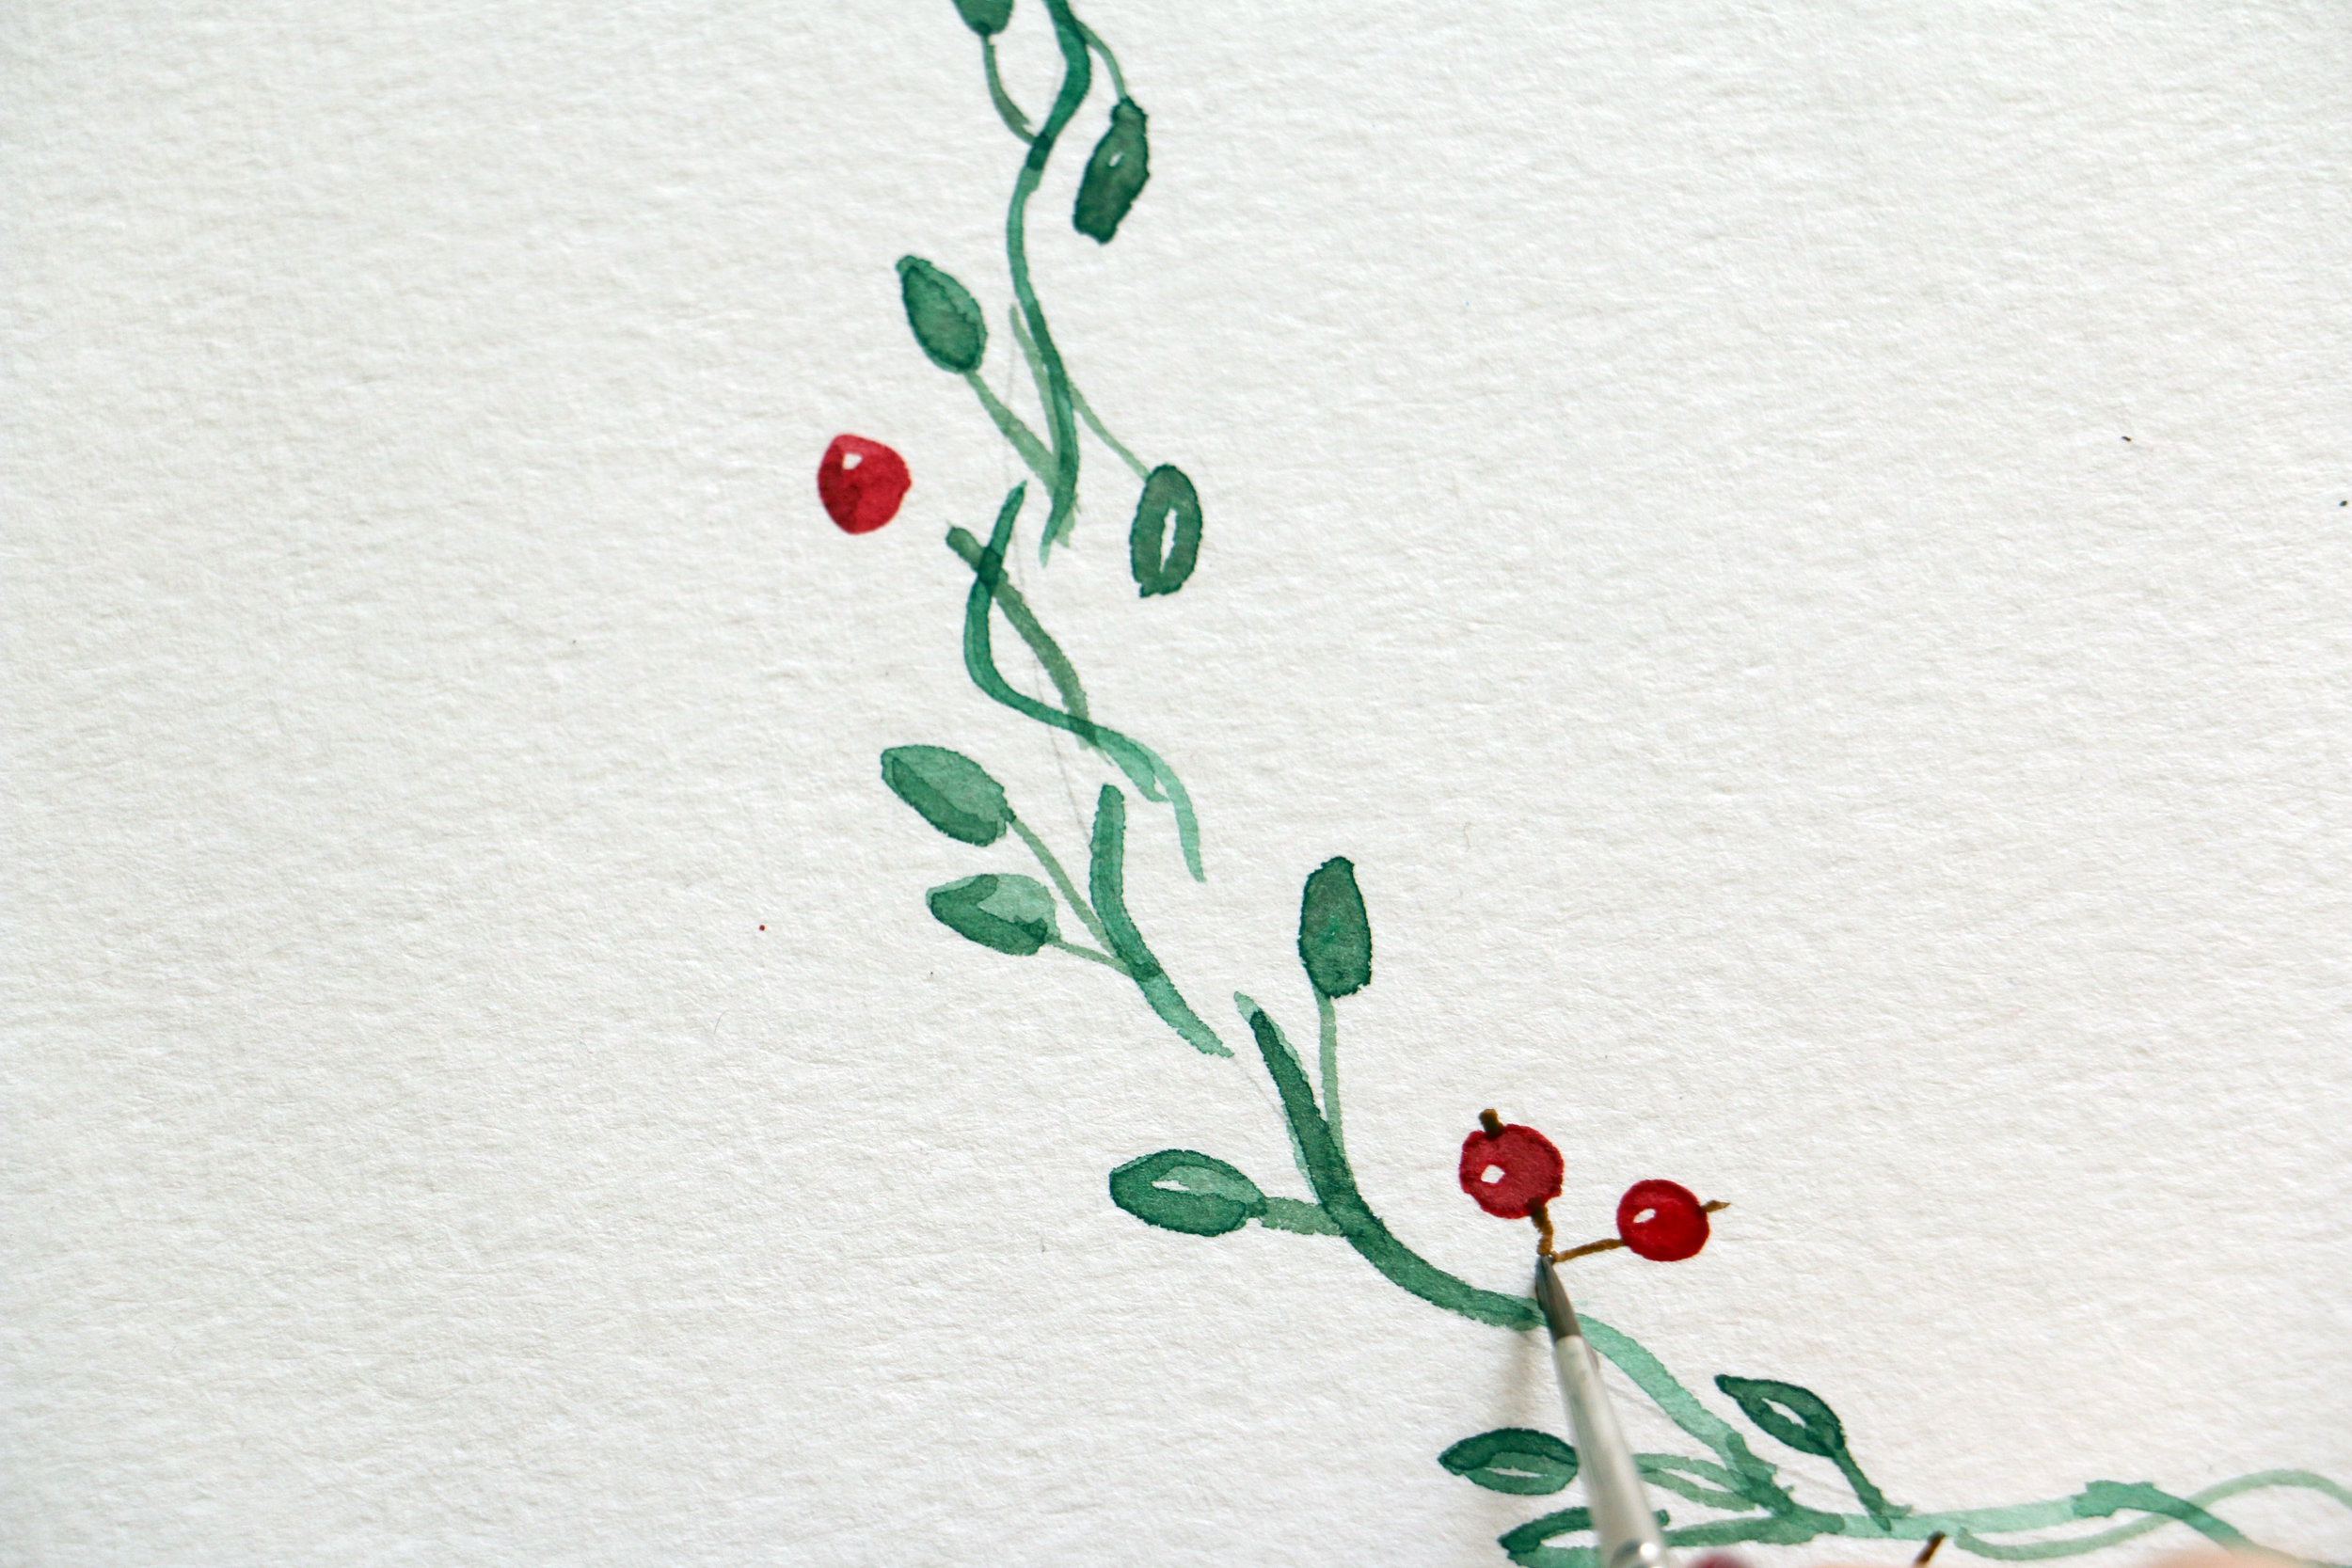
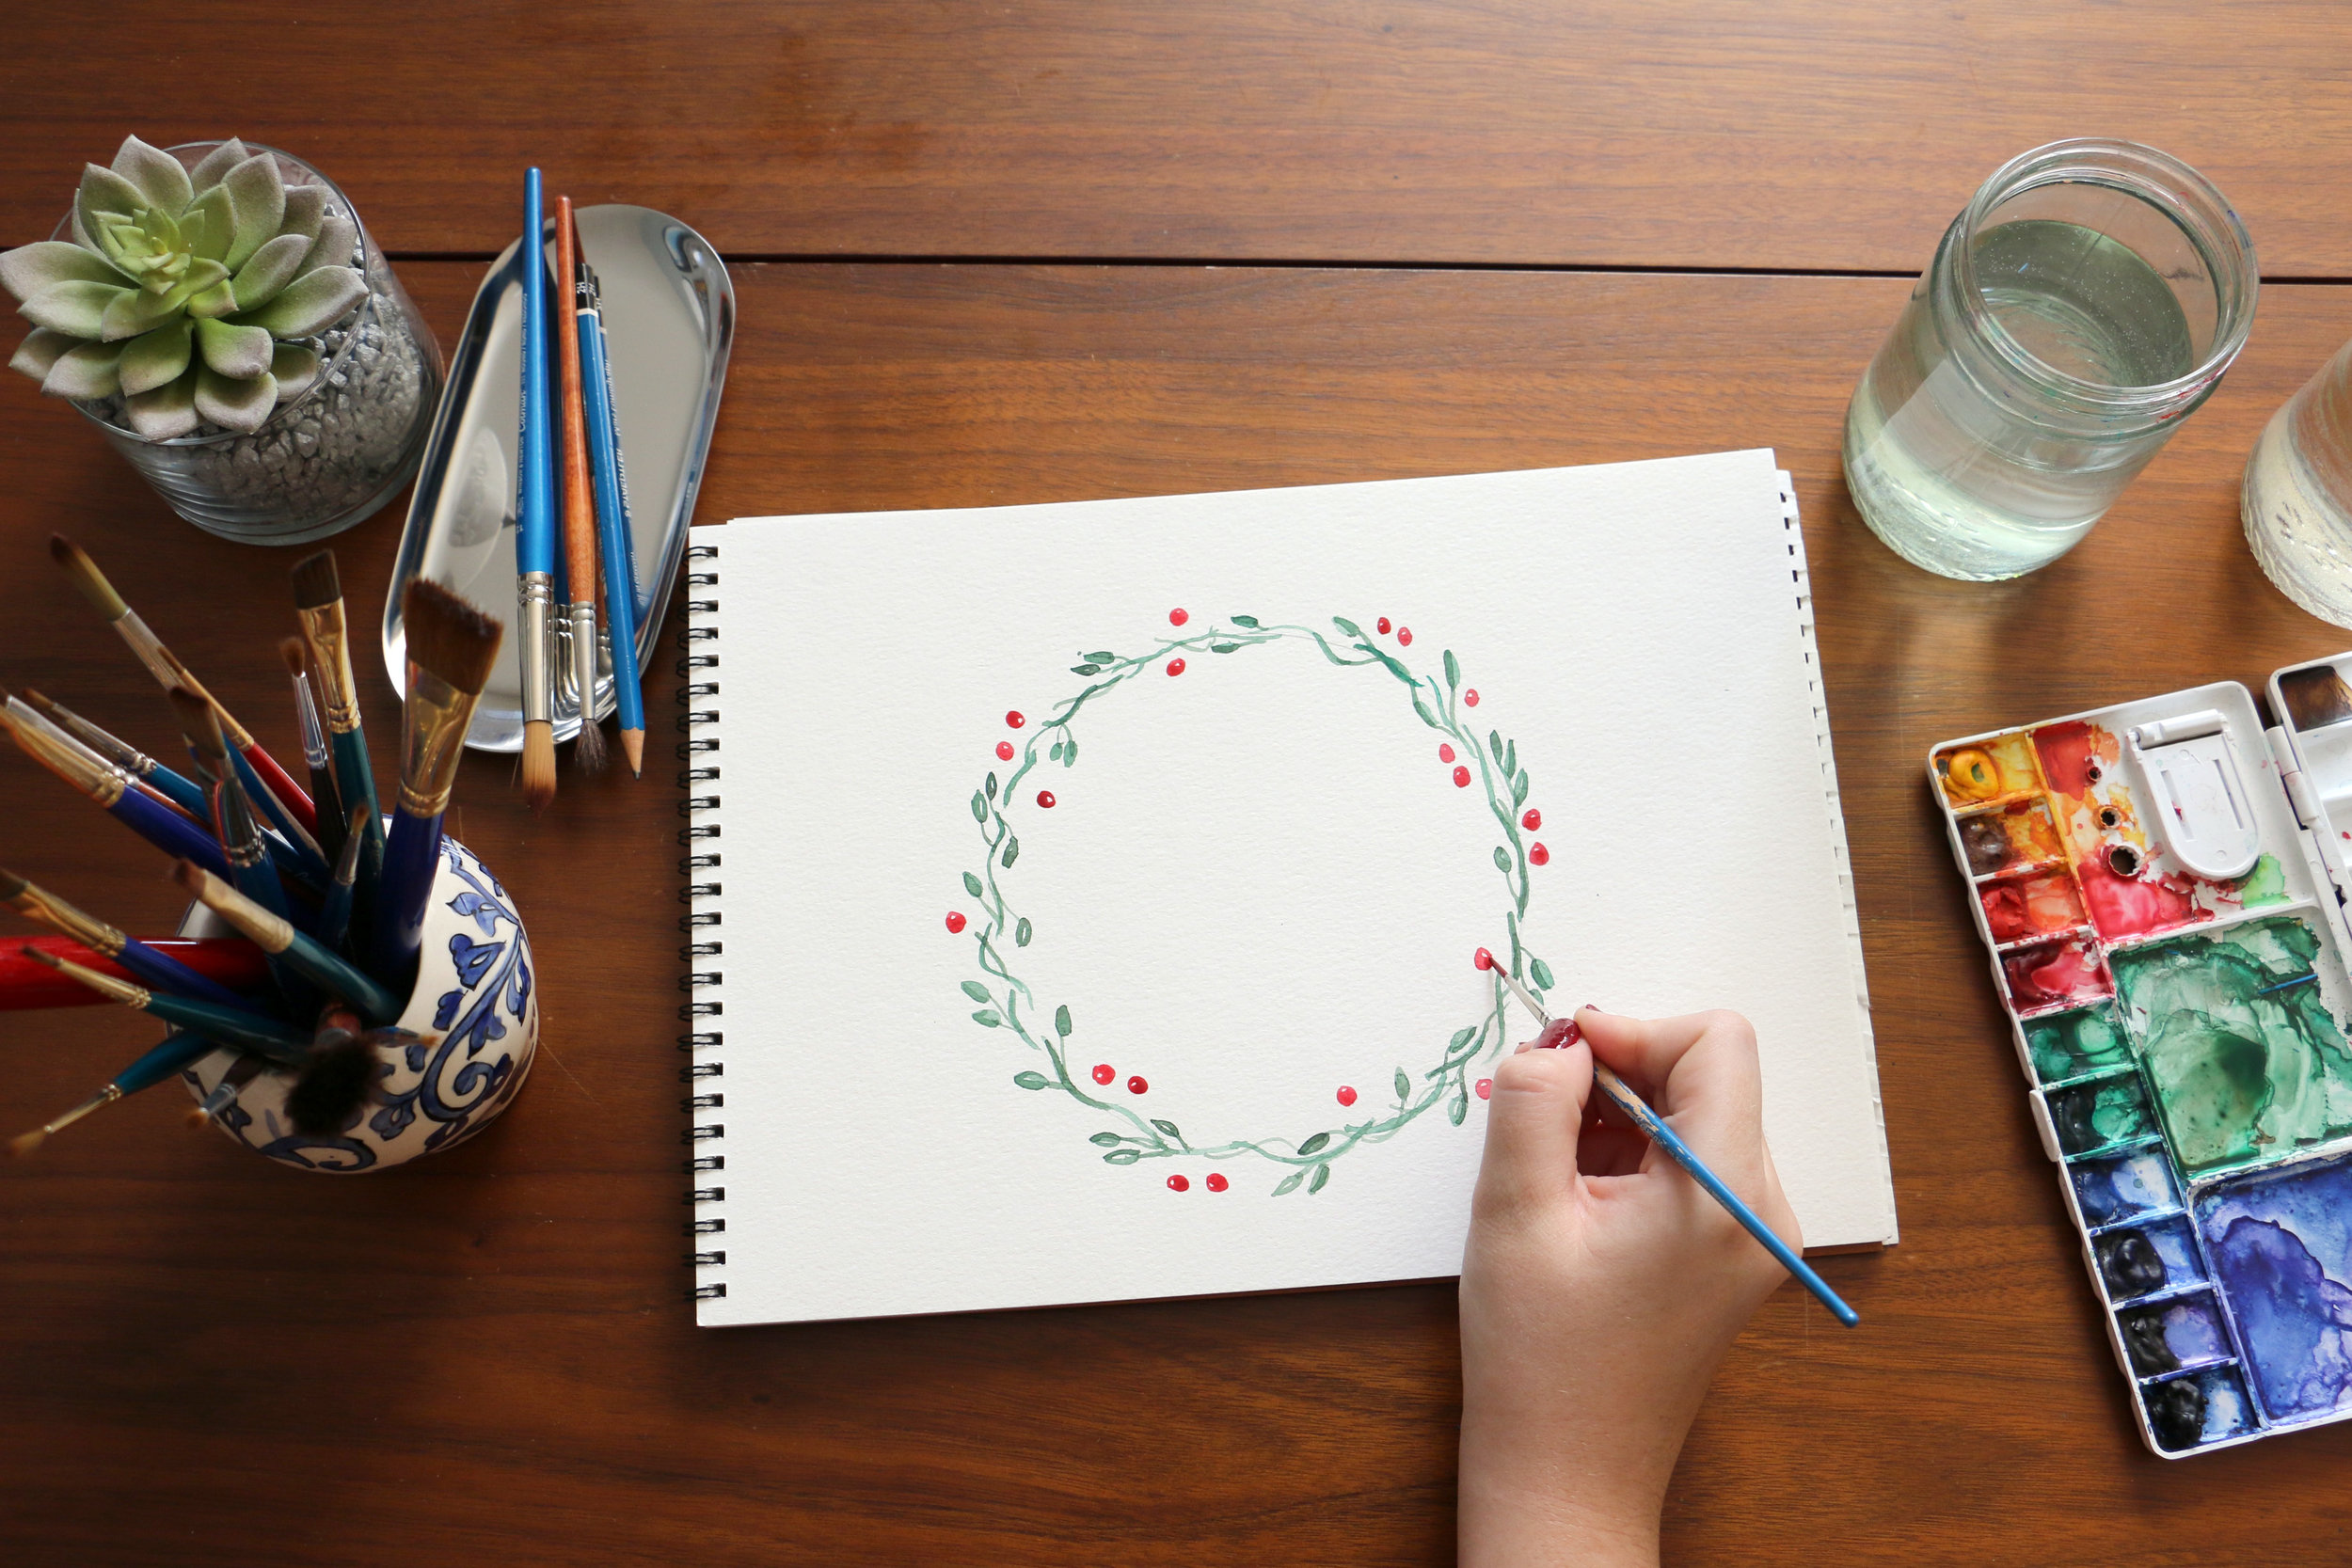
Finally, use a brown paint to add thin branches from your berries to the vine so they're not just hanging out in space. Erase the pencil lines and there you have it, your lovely holiday wreath is complete. Enjoy!
Want to see the whole thing from start to finish? Take a look at the time-lapse video below. Shoot me an email at paperbyjlee@gmail.com if you have any questions and shop my holiday stationery (including the wreath) here.
Have fun watercoloring!
Jennifer
Shop this tutorial!
You May Also Like...

READ MORE

READ MORE

READ MORE